*This post may contain affiliate links. Read more »
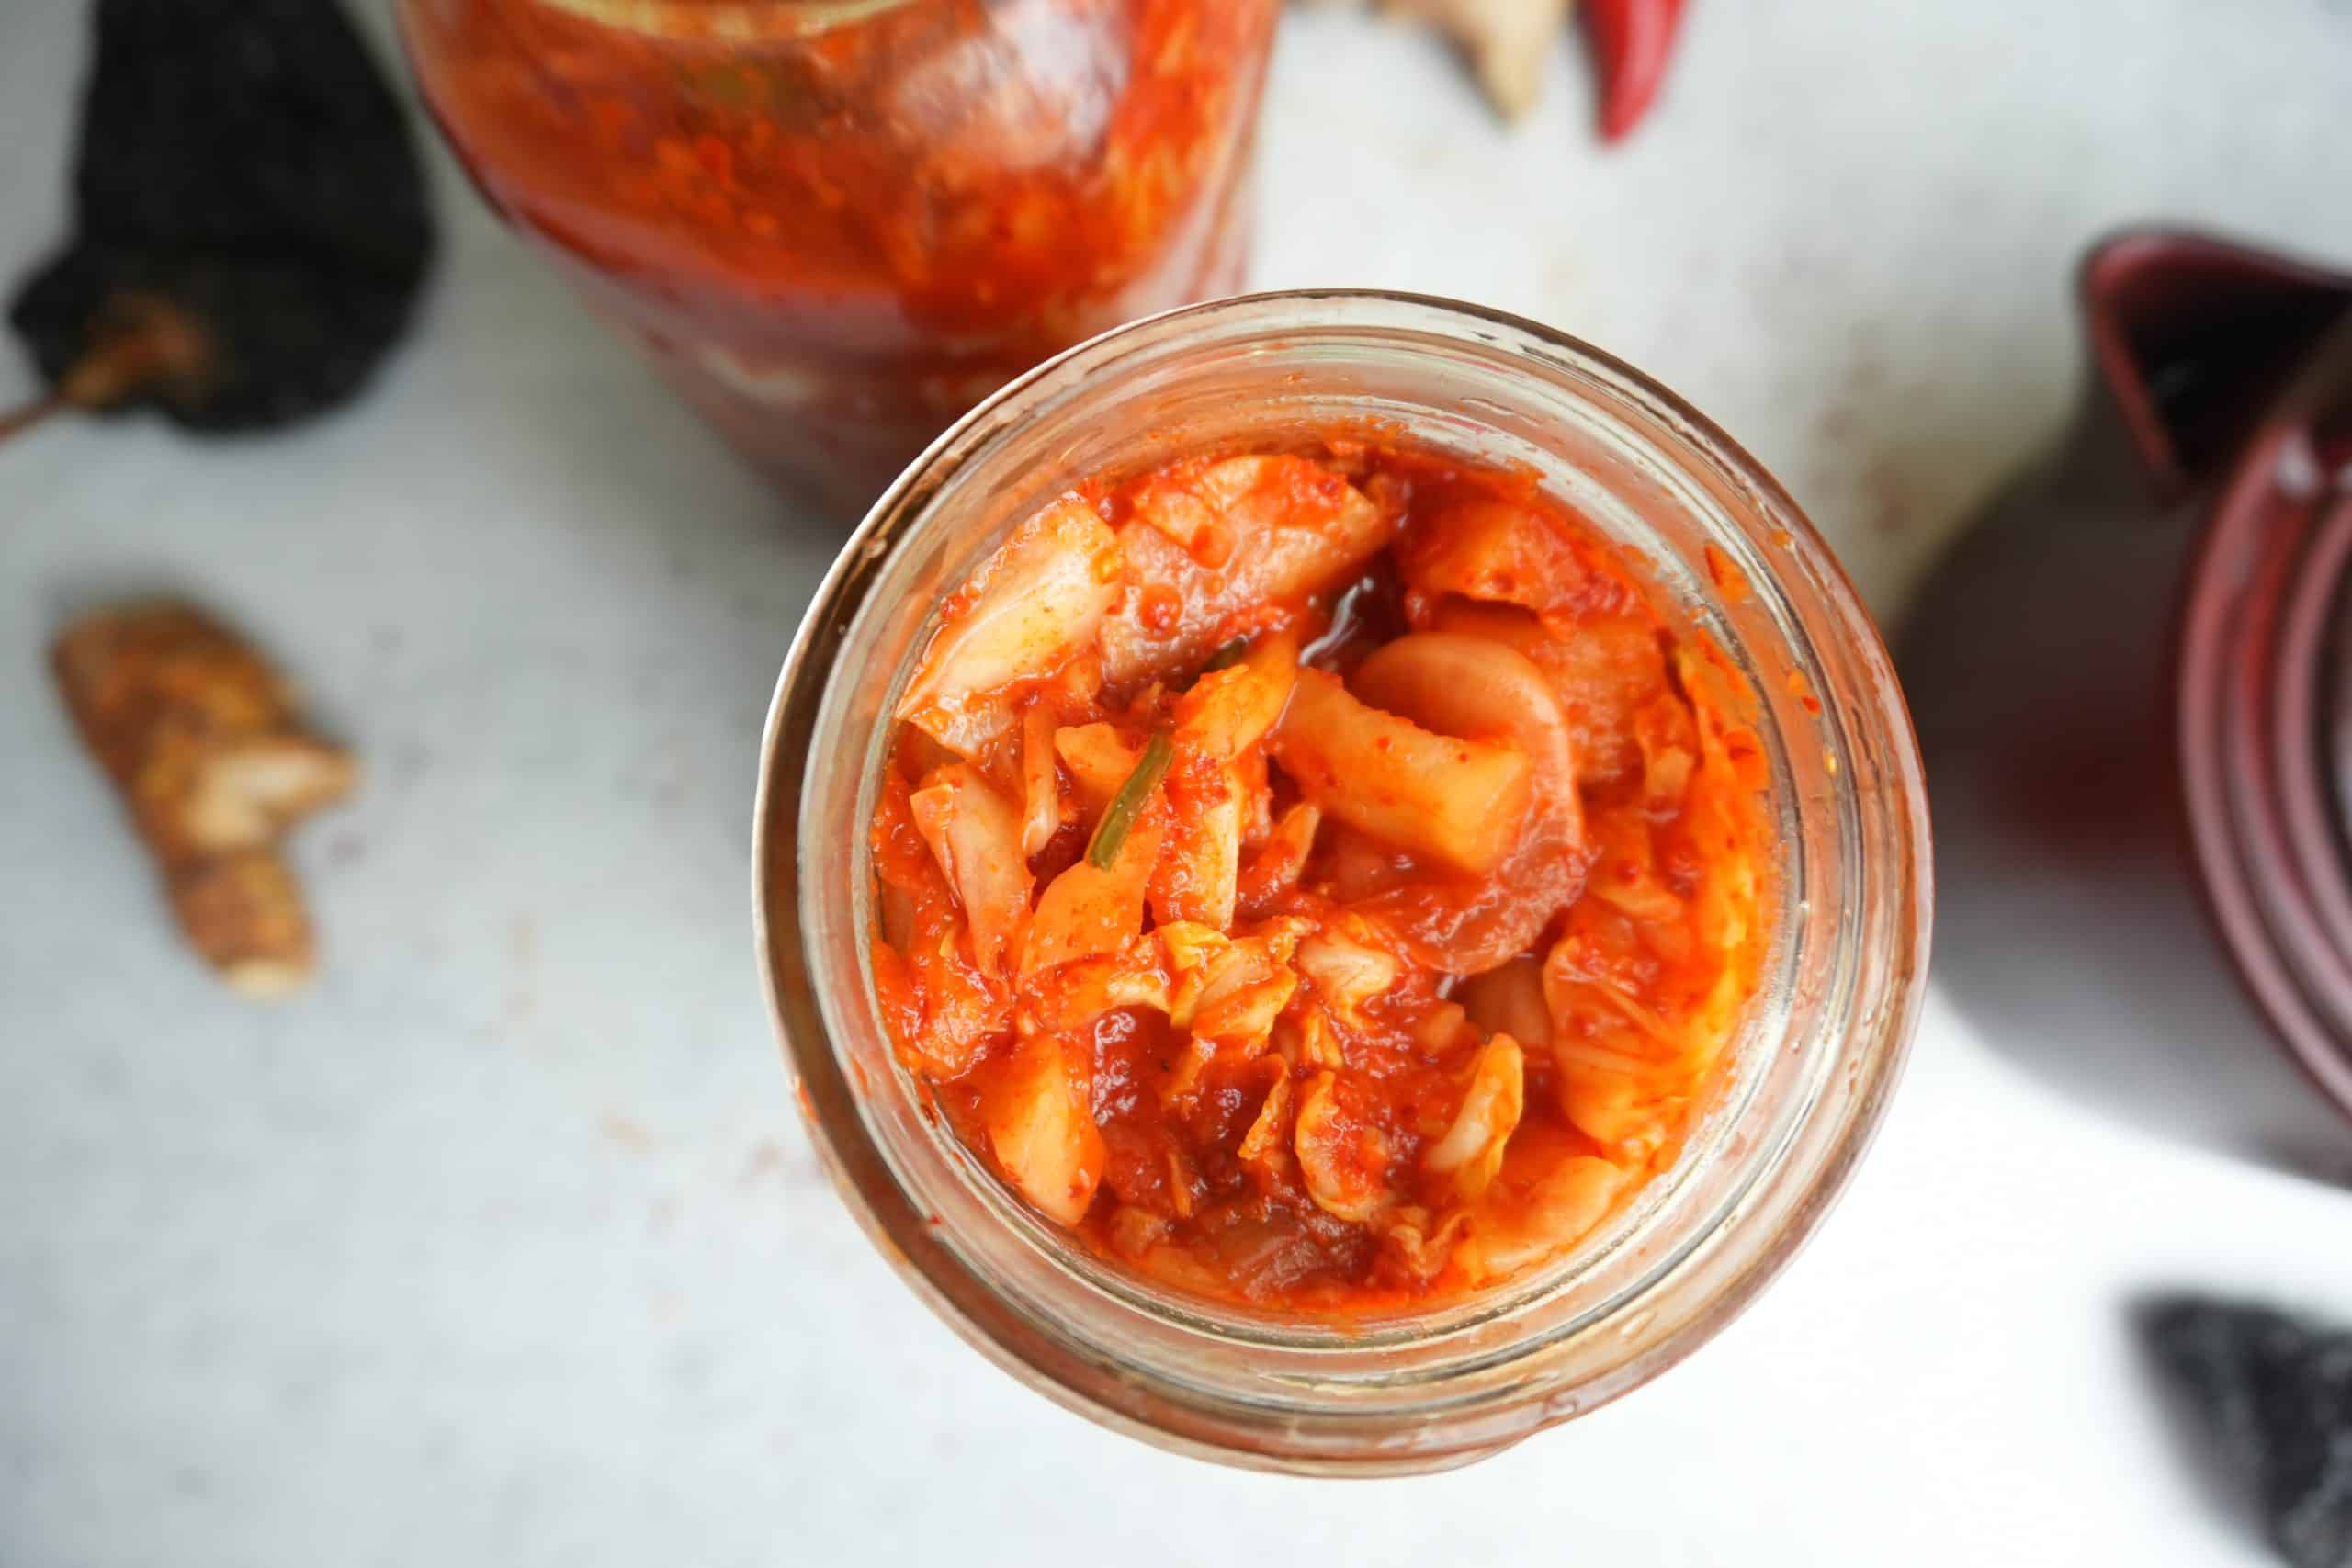
This spicy, tangy flavor bomb of a condiment is irresistible when paired with fluffy rice, added to vegan burgers, or served alongside scallion pancakes. With just 10 ingredients, it's incredibly easy to create perfect vegan kimchi in the comfort of your own home. Savor every bite and treat your taste buds to an explosion of delectable Korean flavors!

Enter your email & I'll send it to your inbox. Plus, get great new recipes from me every week!
By submitting this form, you consent to receive emails from Cinnamon Snail.
For years there was no good quality vegetarian kimchi on the market. All the good-looking stuff contained fish. So, I started making giant batches of this kimchi, and my vegan radish kimchi to use on my Korean BBQ Seitan, and gochujang seitan sammy I served on my food truck.
At one point, I was churning out a batch once a week that used over 100 lbs of cabbage, and we had to brine the veggies in massive industrial stainless steel sinks. I still make kimchi at home because it is such an affordable condiment that makes everything from vegan kimchi fried rice, to vegan korean fried chicken more wonderful!

![]()
I have been making giant batches of this kimchi every couple of months for years! I love it so much. I usually ferment a bit longer because I like it really sour. I can't believe how expensive a tiny jar is at the store now. Make this instead!! And then make kimchi soup from Street Vegan!!
Jump to:

⭐️ Why you'll adore this vegan kimchi recipe
✊ Kimchi Without the Price Tag: Making your own vegan kimchi costs just 10-15% of what you'd pay for store-bought. More kimchi, less spending-that's a win.
🔥 Spice It Your Way: Whether you love fiery heat or prefer it mild, this recipe adapts to your perfect level of spice.
🏆 Battle-Tested Brilliance: I've been making this for 15 years, and it's even won awards on dishes from my food truck. On top of that, before publishing it, like all of my vegan Korean recipes, it was first tried out and apporved by hundreds of recipes testers from around the world.

🤘learn to make insanely flavorful vegan sides
This guide to my most popular vegan side dishes is 100% FREE, & you'll love the actual heck out of it 🥰
🥬 Vegan Kimchi Ingredients
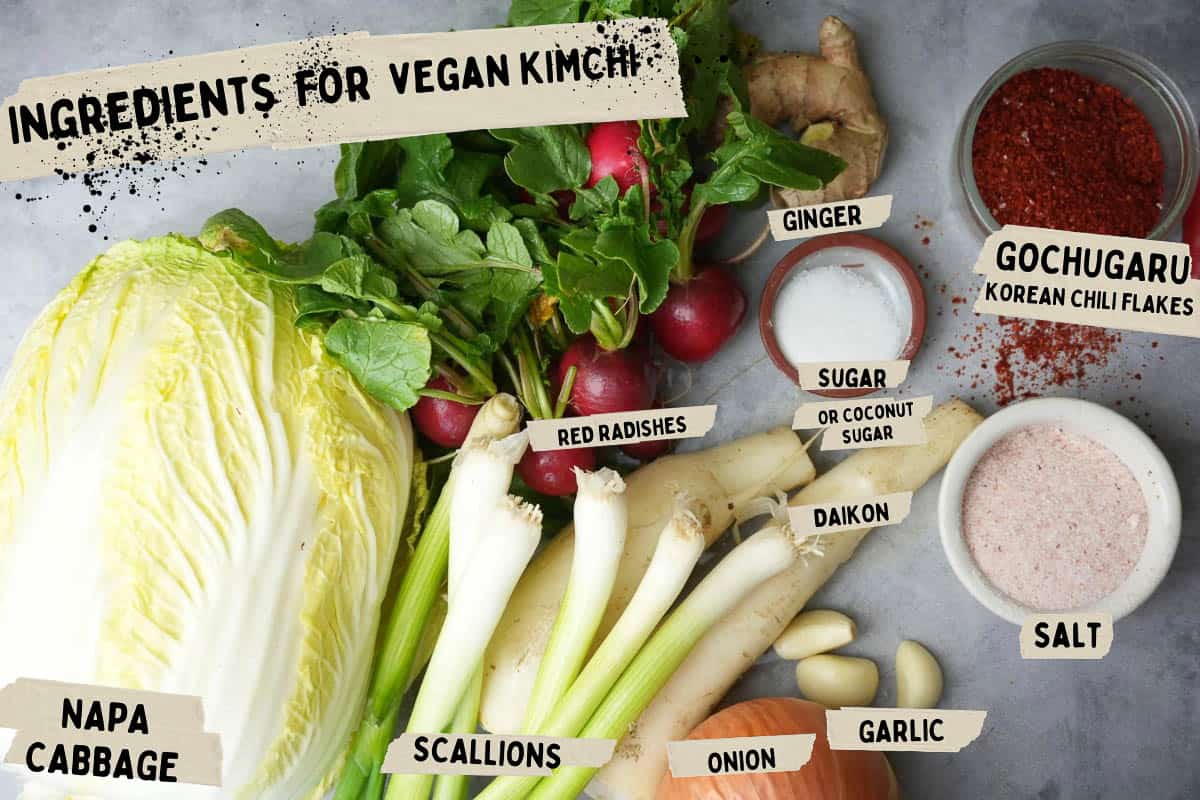
Cabbage
A medium size head of napa cabbage will make 2-3 quarts of finished kimchi. The napa is more tender than regular green cabbage, which I wouldn't recommend using. Regular green cabbage can work, but the textures really not the same.
Gochugaru
Gochugaru - a.k.a coarse Korean chili flakes. This ground red chili has a vibrant color and a perfect not-too-spicy flavor. It is essential to get the kimchi flavor. Don't even think about swapping out crushed red pepper flakes (too spicy and seedy) or some other basic-ass chili powder. No. Just grab this stuff online or at an Asian grocery store. It's awesome in many other recipes.
Salt
Don't freak out. There is a LOT of salt in this recipe, but don't dismay- you will not be consuming most of it. Salt is an essential part of the brining process that allows healthy fermentation to occur. Most of the salt is going to kill unwanted bacteria, and then be rinsed off the veggies before the fermentation process starts- long before this condiment reaches your plate.
Sugar
I use evaporated cane juice, but any dry granulated sugar will work such as coconut sugar (used in klepon and kuih dadar), or palm sugar (used in bubur cha cha). Its not here for sweetness, and we don't use a ton at all in this recipe. It is giving the bacteria you want to encourage a tiny bit of food as a head start.
Red radishes and daikon
I like using both radishes for variety in this recipe. Sometimes I also include watermelon radishes because they are super pretty. But you can cut the red radishes out if you want to keep the recipe more minimal and your shopping a little scaled back.
Ginger
Not everyone uses fresh ginger in their kimchi, but I sure as heck do! And since this is my recipe, you are screwed now and have to use it! …unless you don't want to, and then I can't really force you
*See the recipe card at the bottom of the page for exact quantities, nutritional info, and detailed cooking directions.
📖 How to make vegan kimchi
Check out this step-by-step guide with photos to see just how your kimchi should look at each stage of preparation!
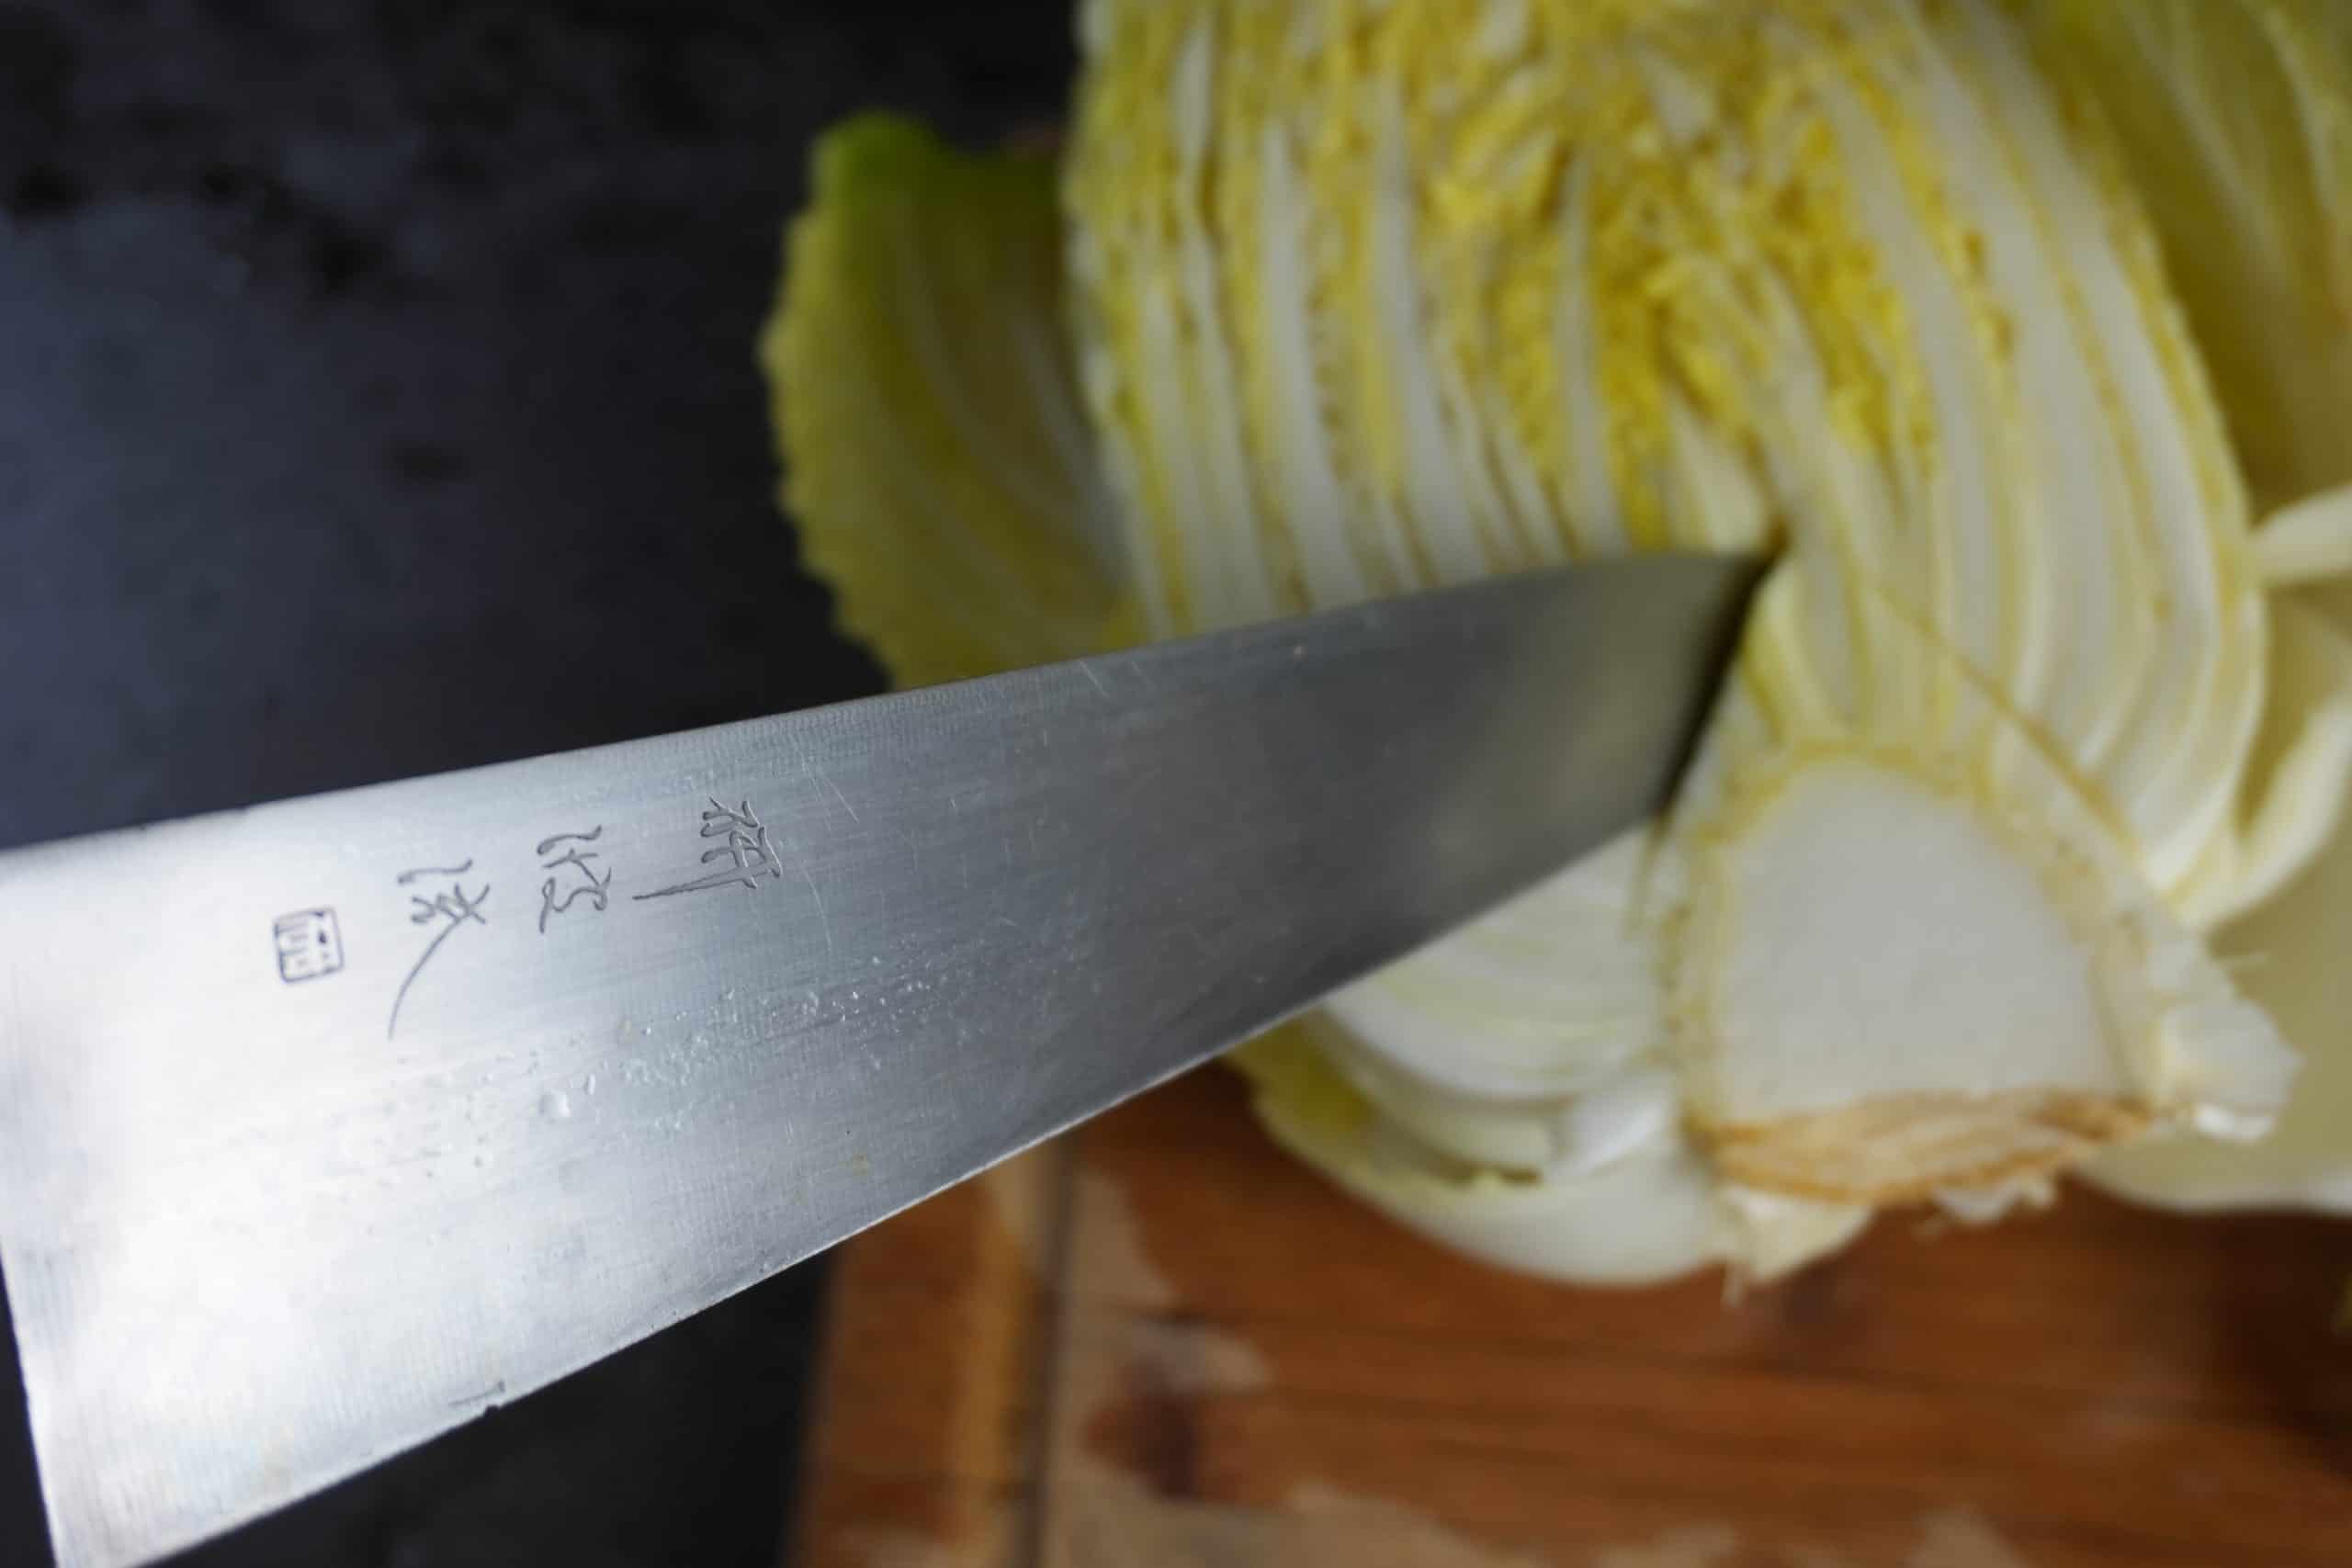
Step 1
Cut napa cabbage in half and remove its core. Cut the cabbage into 1 inch (2.5 cm) thick slices, including all the rib parts.
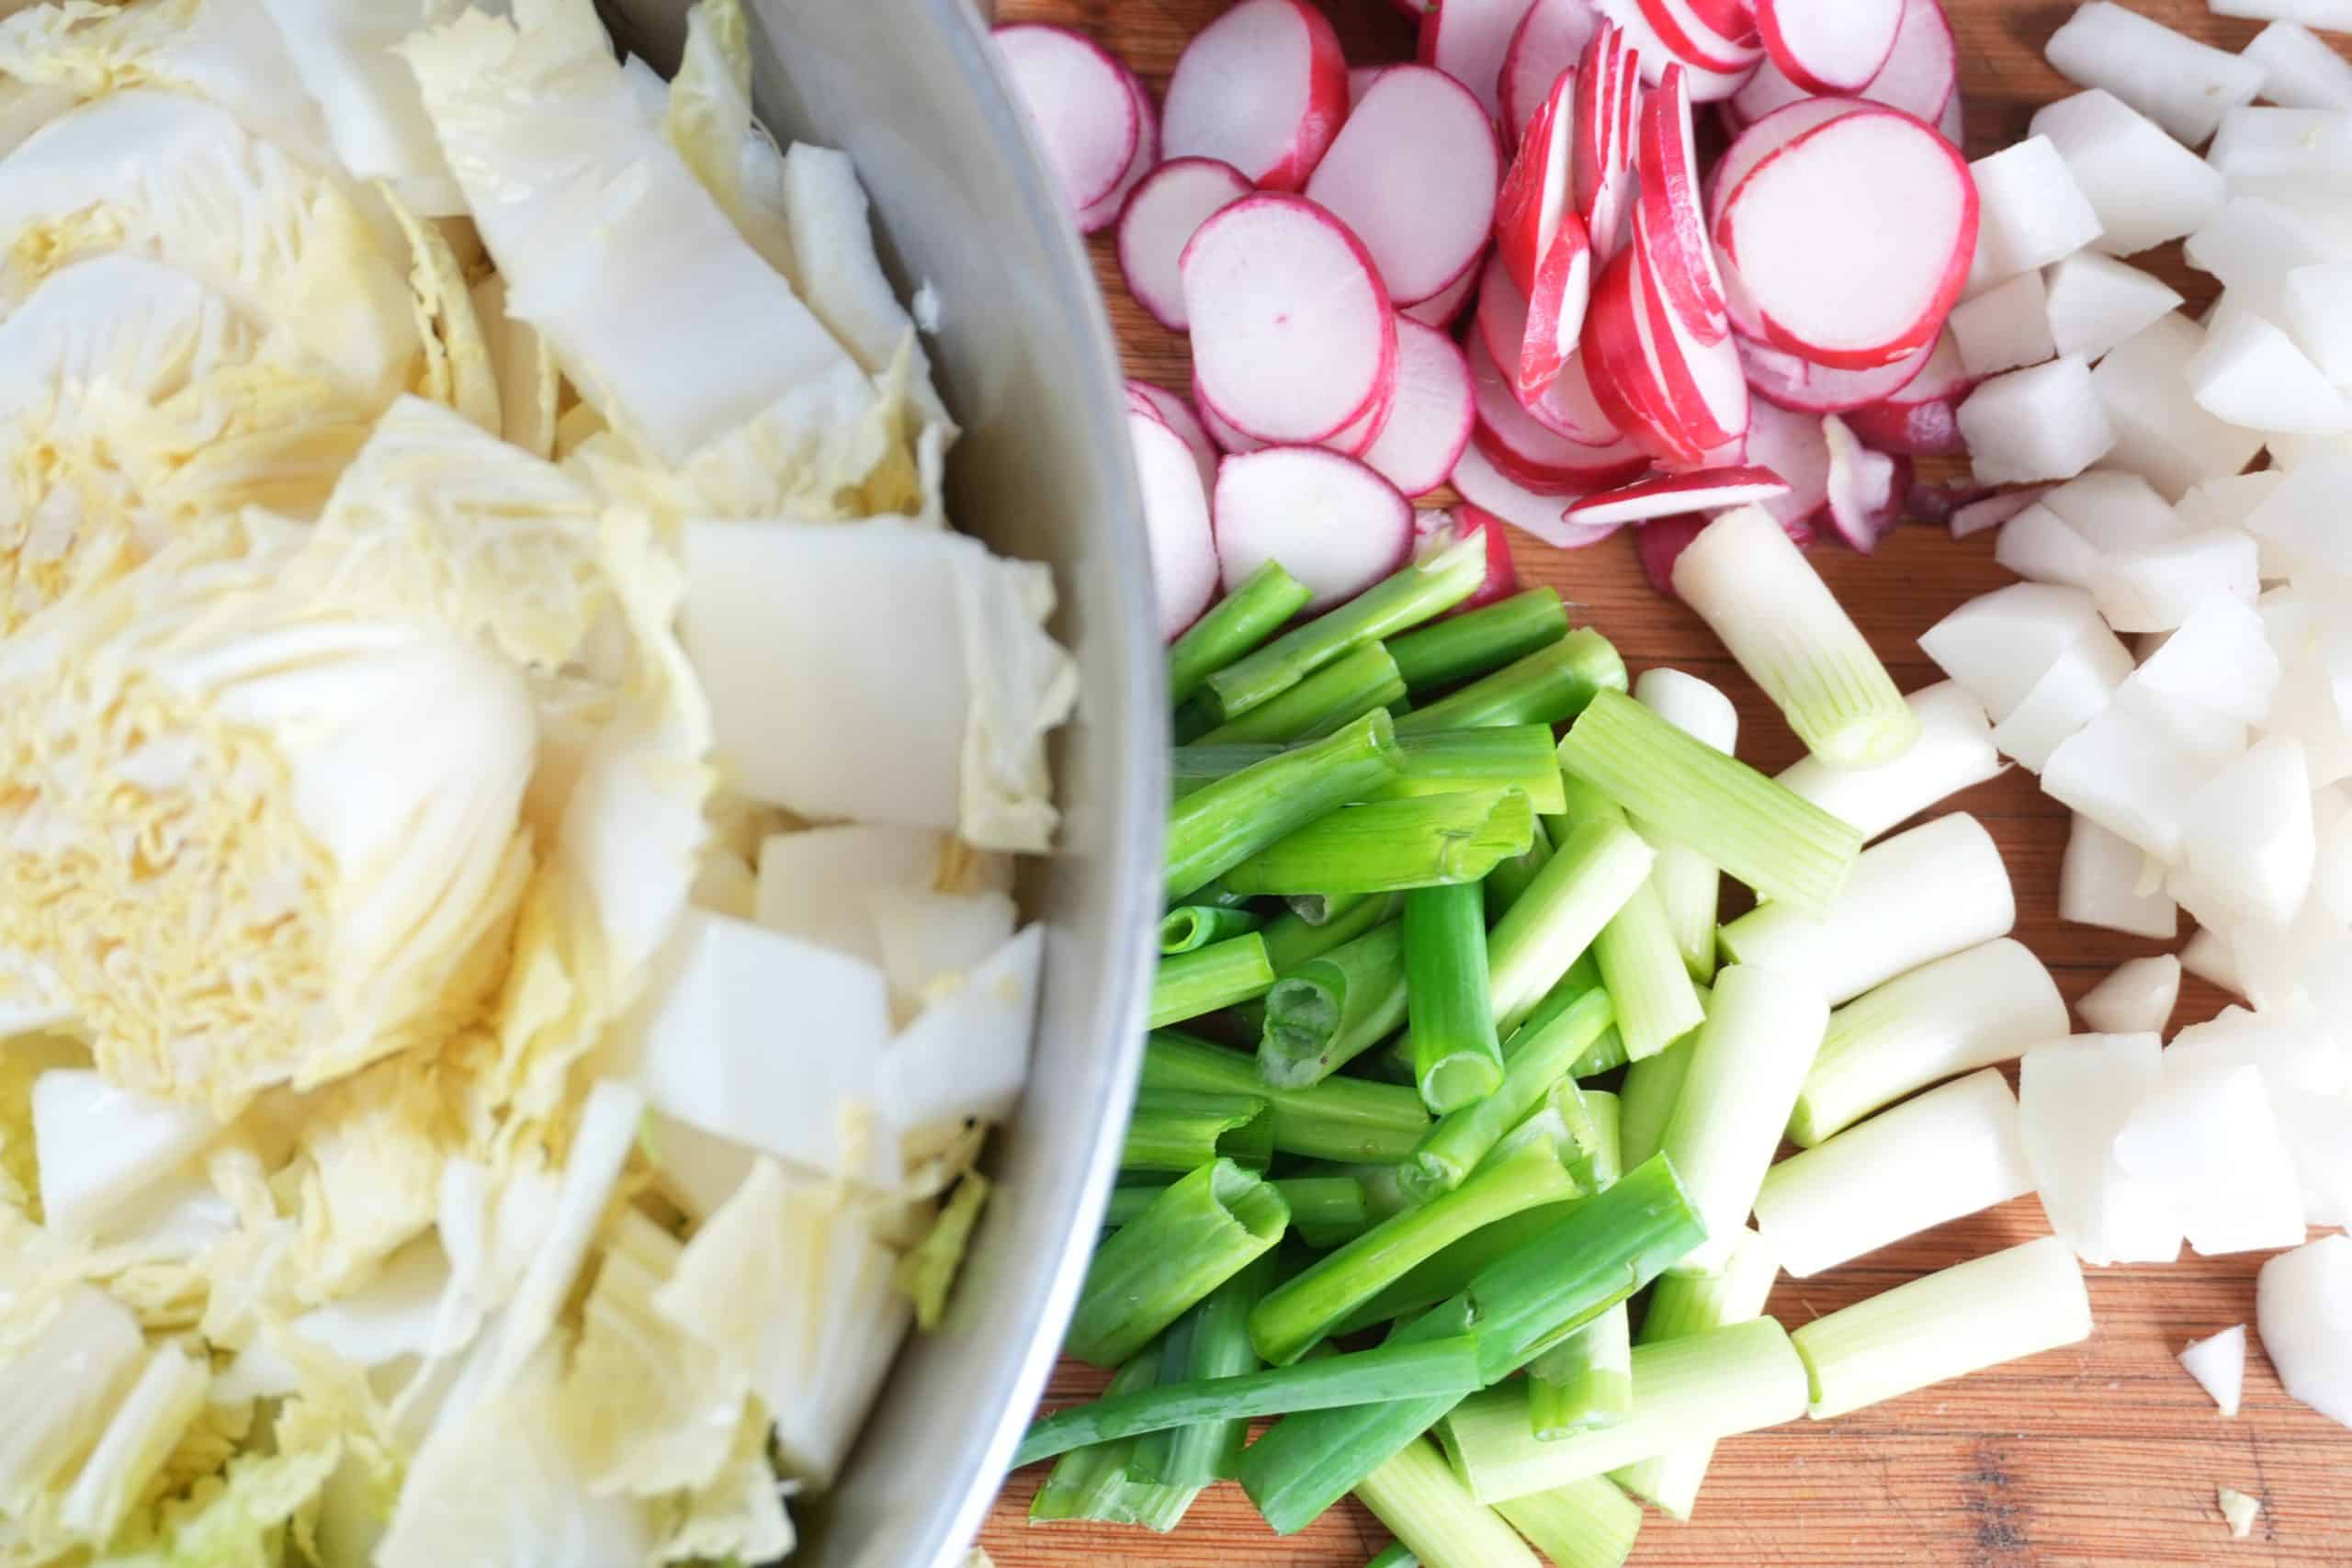
Step 2
Clean and skin the daikon. Dice it into 1 cm. cubes. Slice the red radishes, and cut the green onion into 1 inch (2.5 cm) pieces.
Step 3
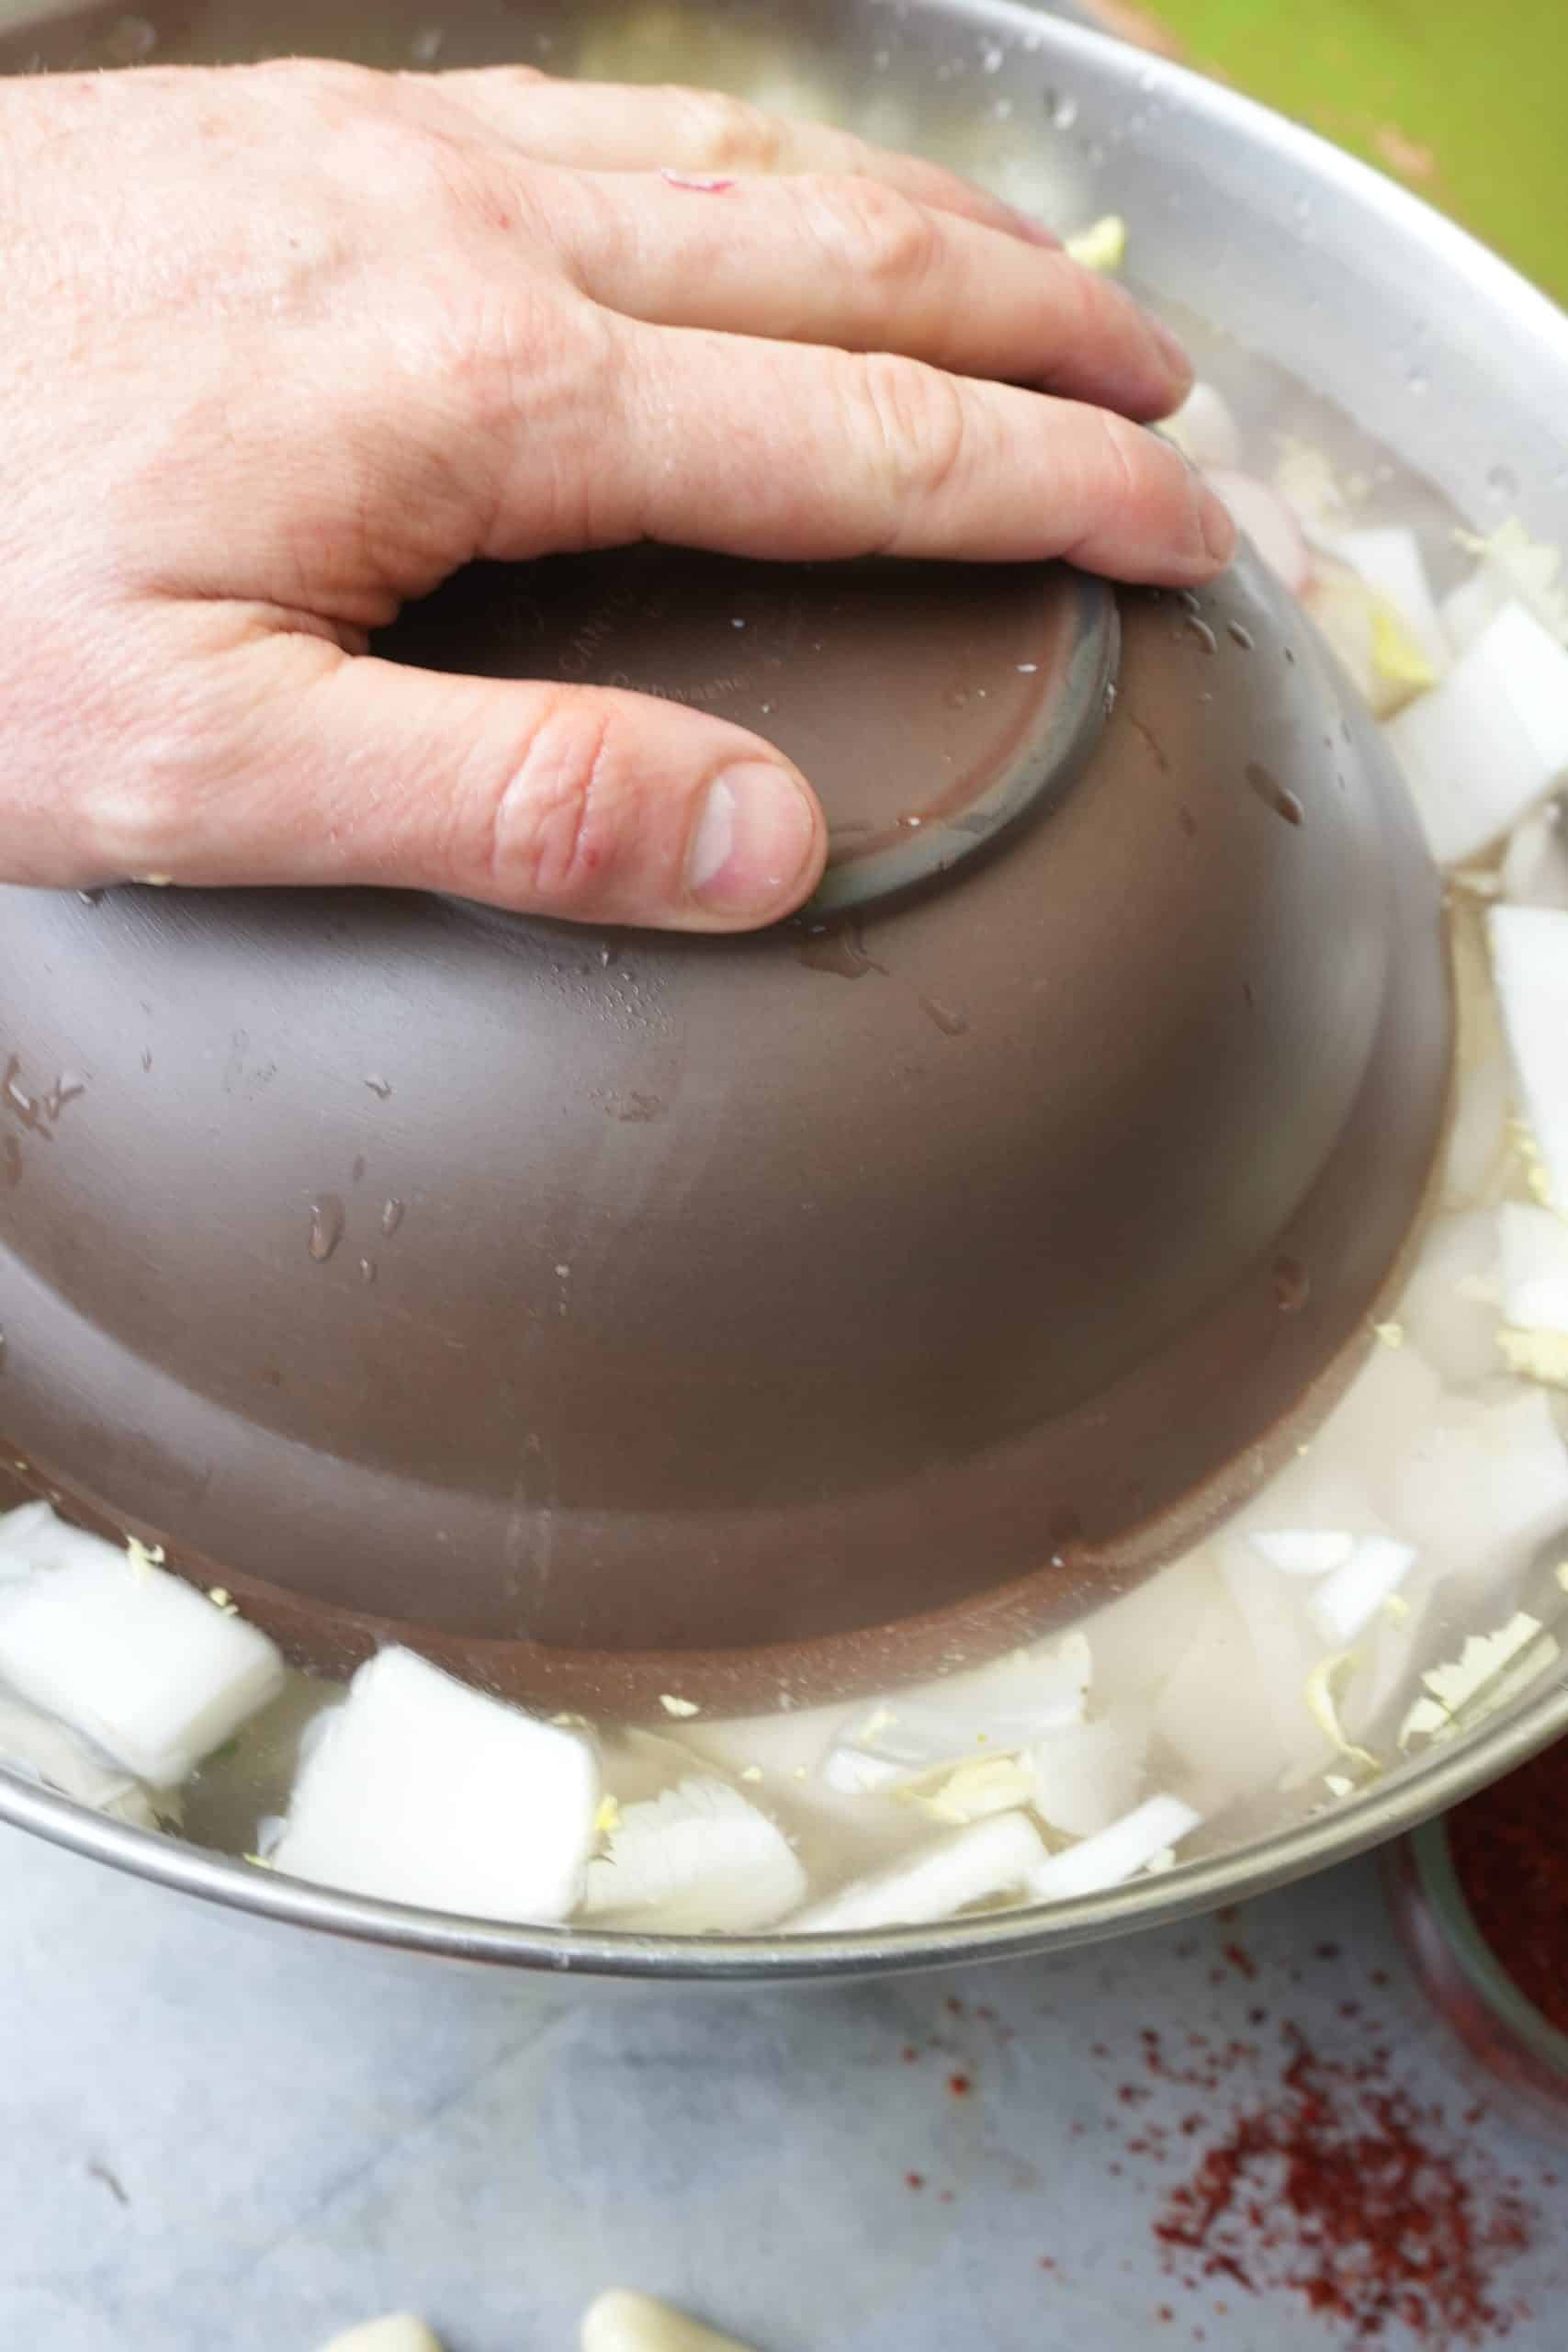
Place the cut veggies into a bowl, and cover with SERIOUSLY salty water (½ cup salt, 12 cups water). Brine the veggies at room temperature for 5 hours.
Step 4
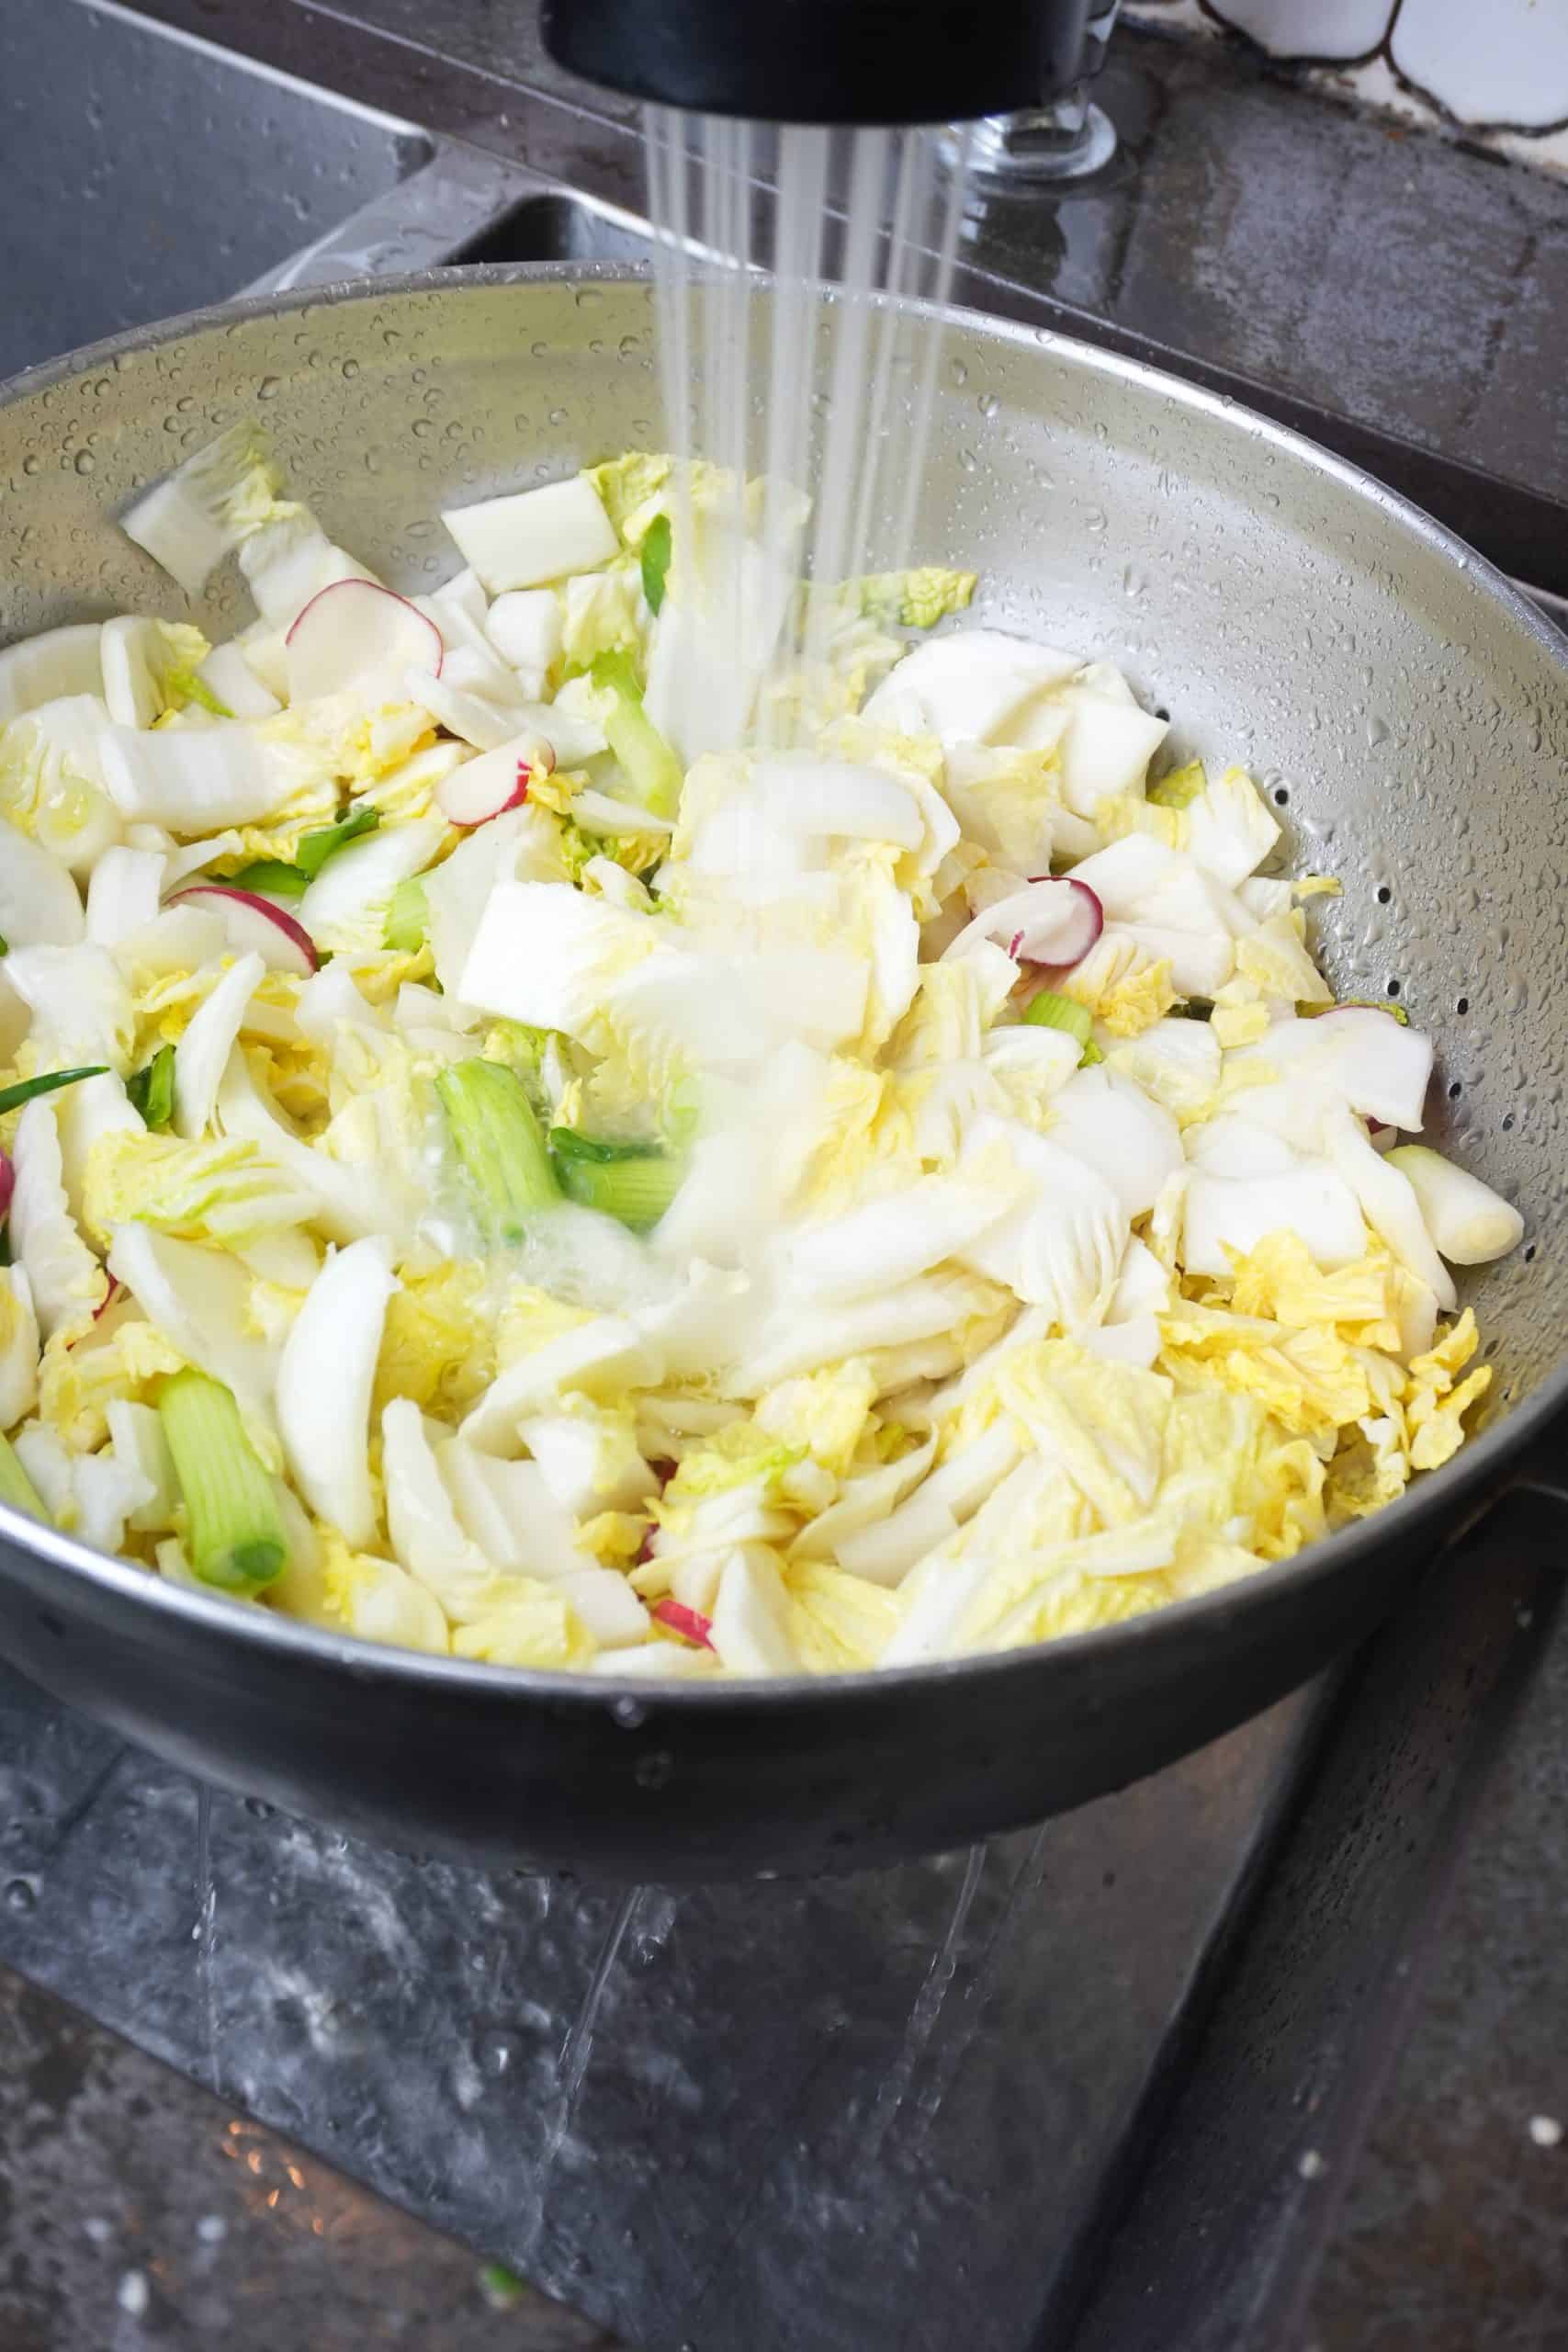
Thoroughly rinse the brined veggies to remove most of the salty flavor.
Step 5
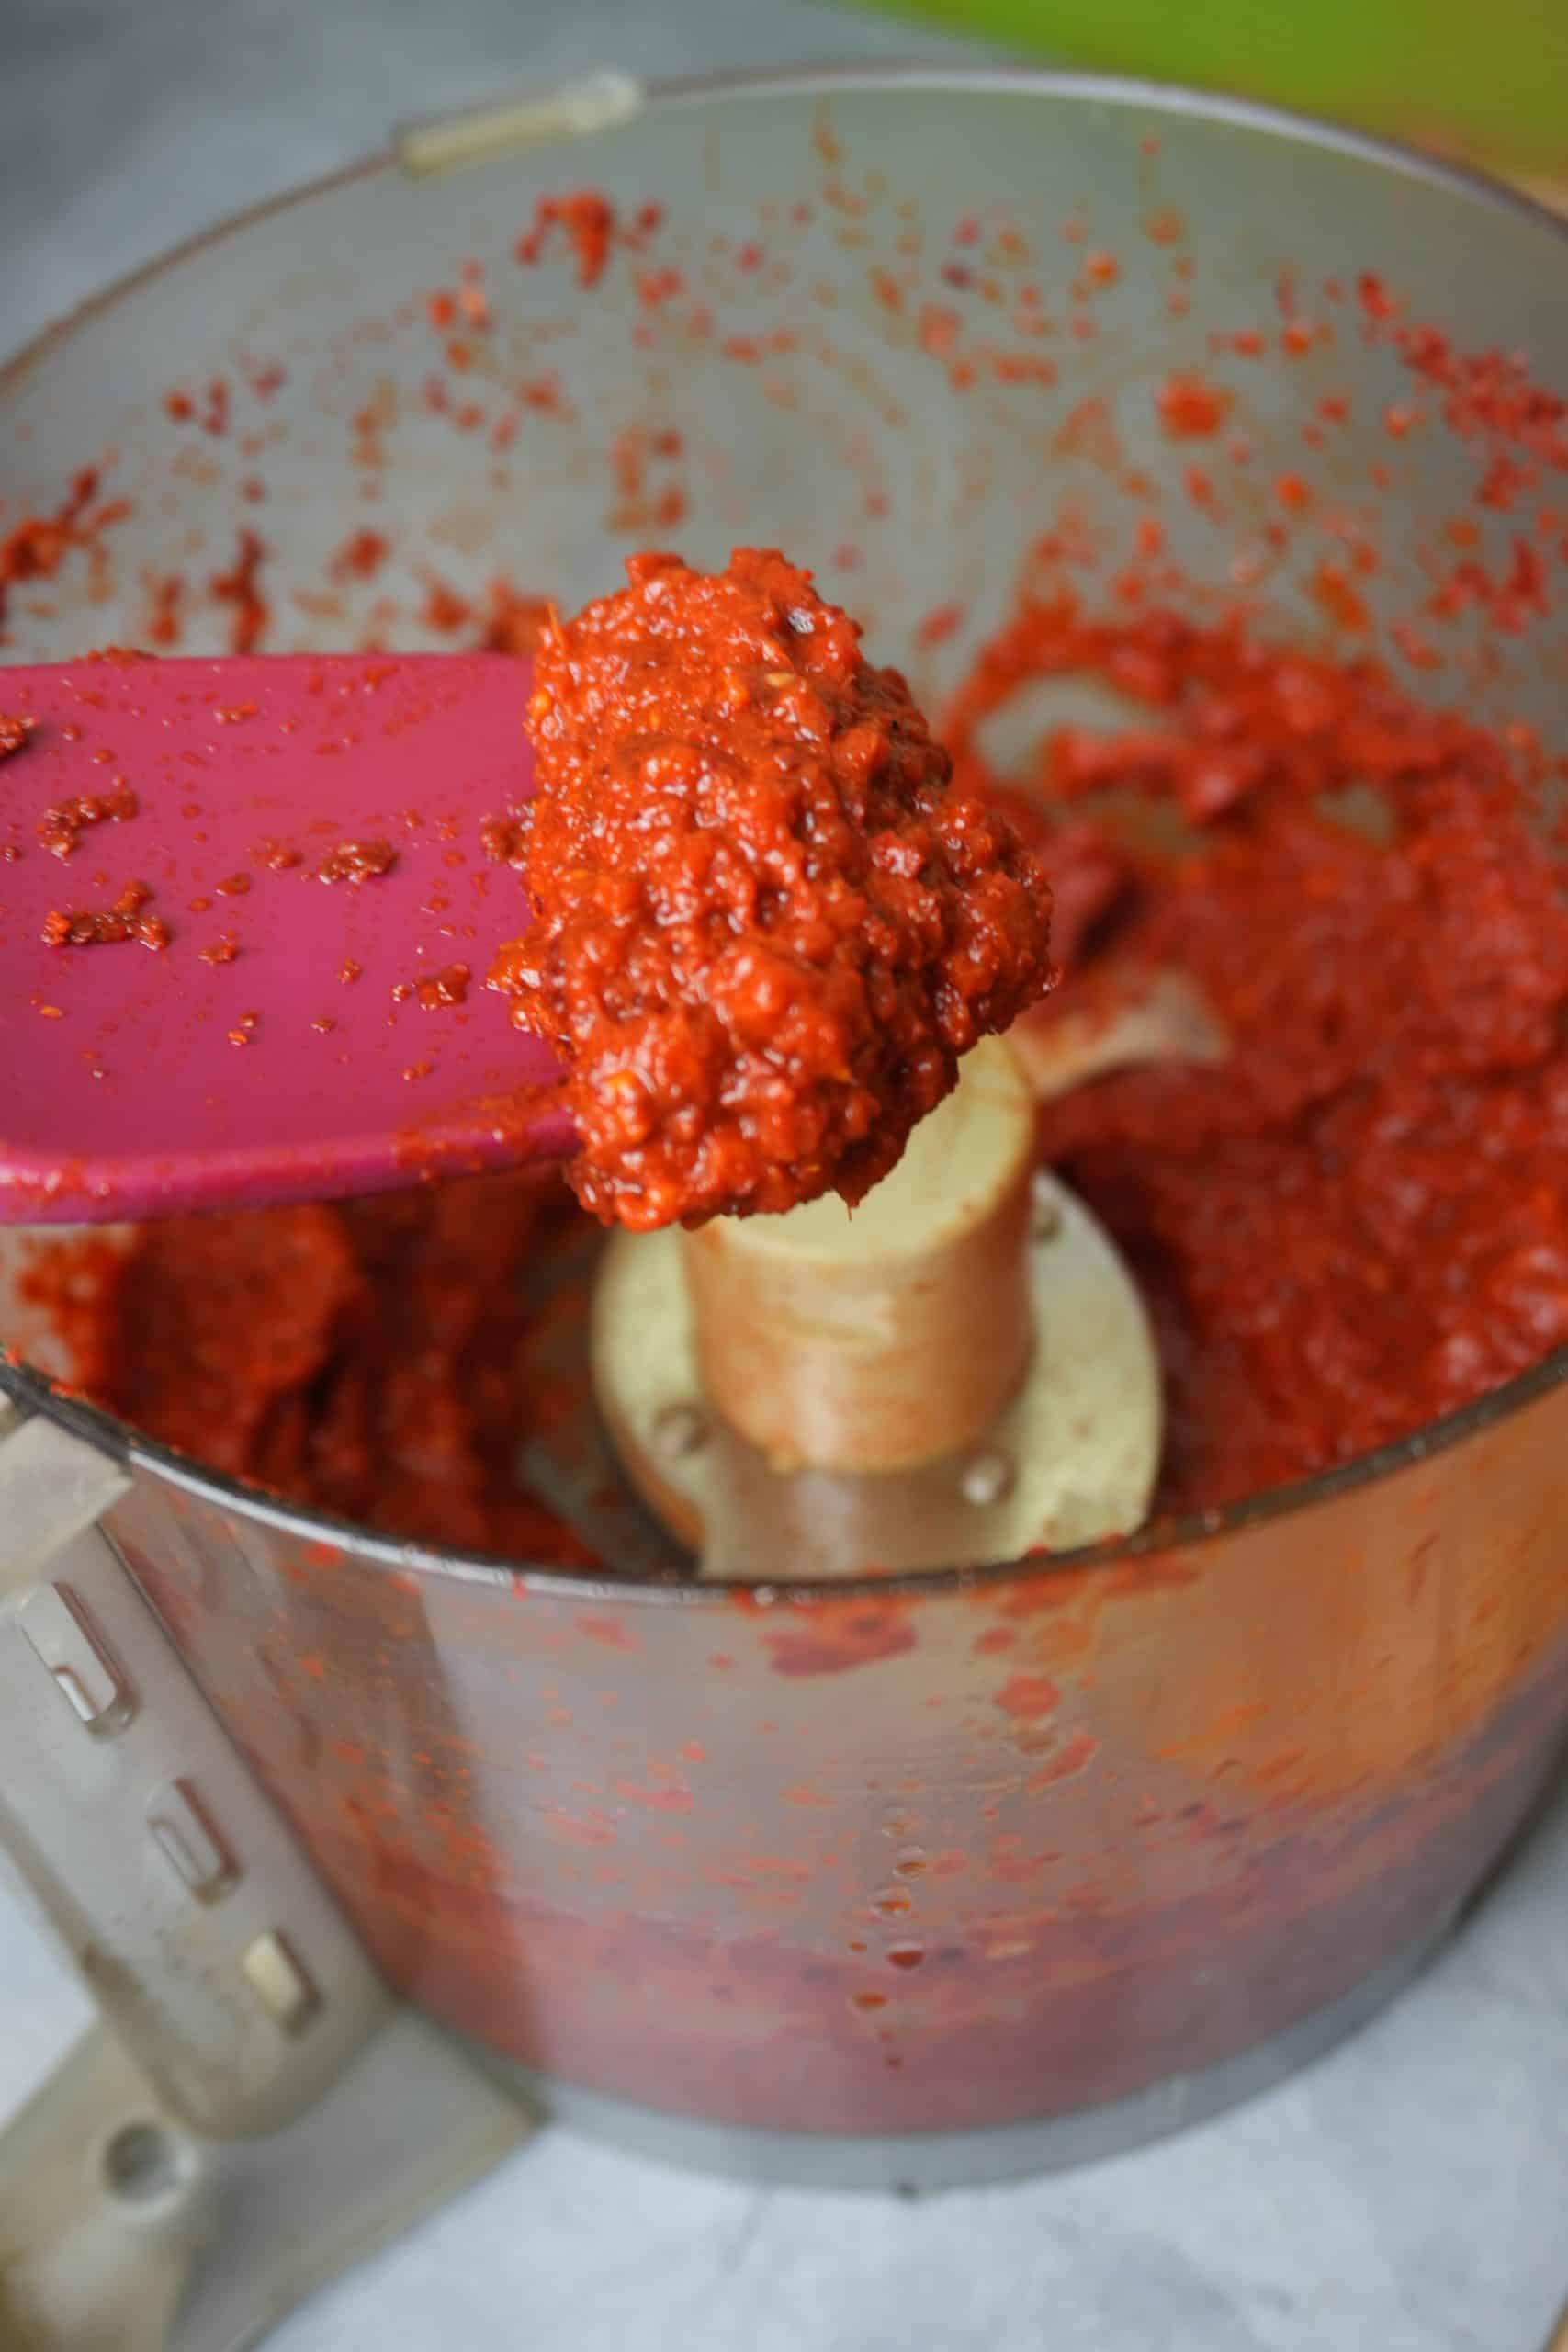
Grind the gochugaru (korean chili), onion, garlic, ginger, salt, sugar and water to create a pungent chili paste.
Step 6
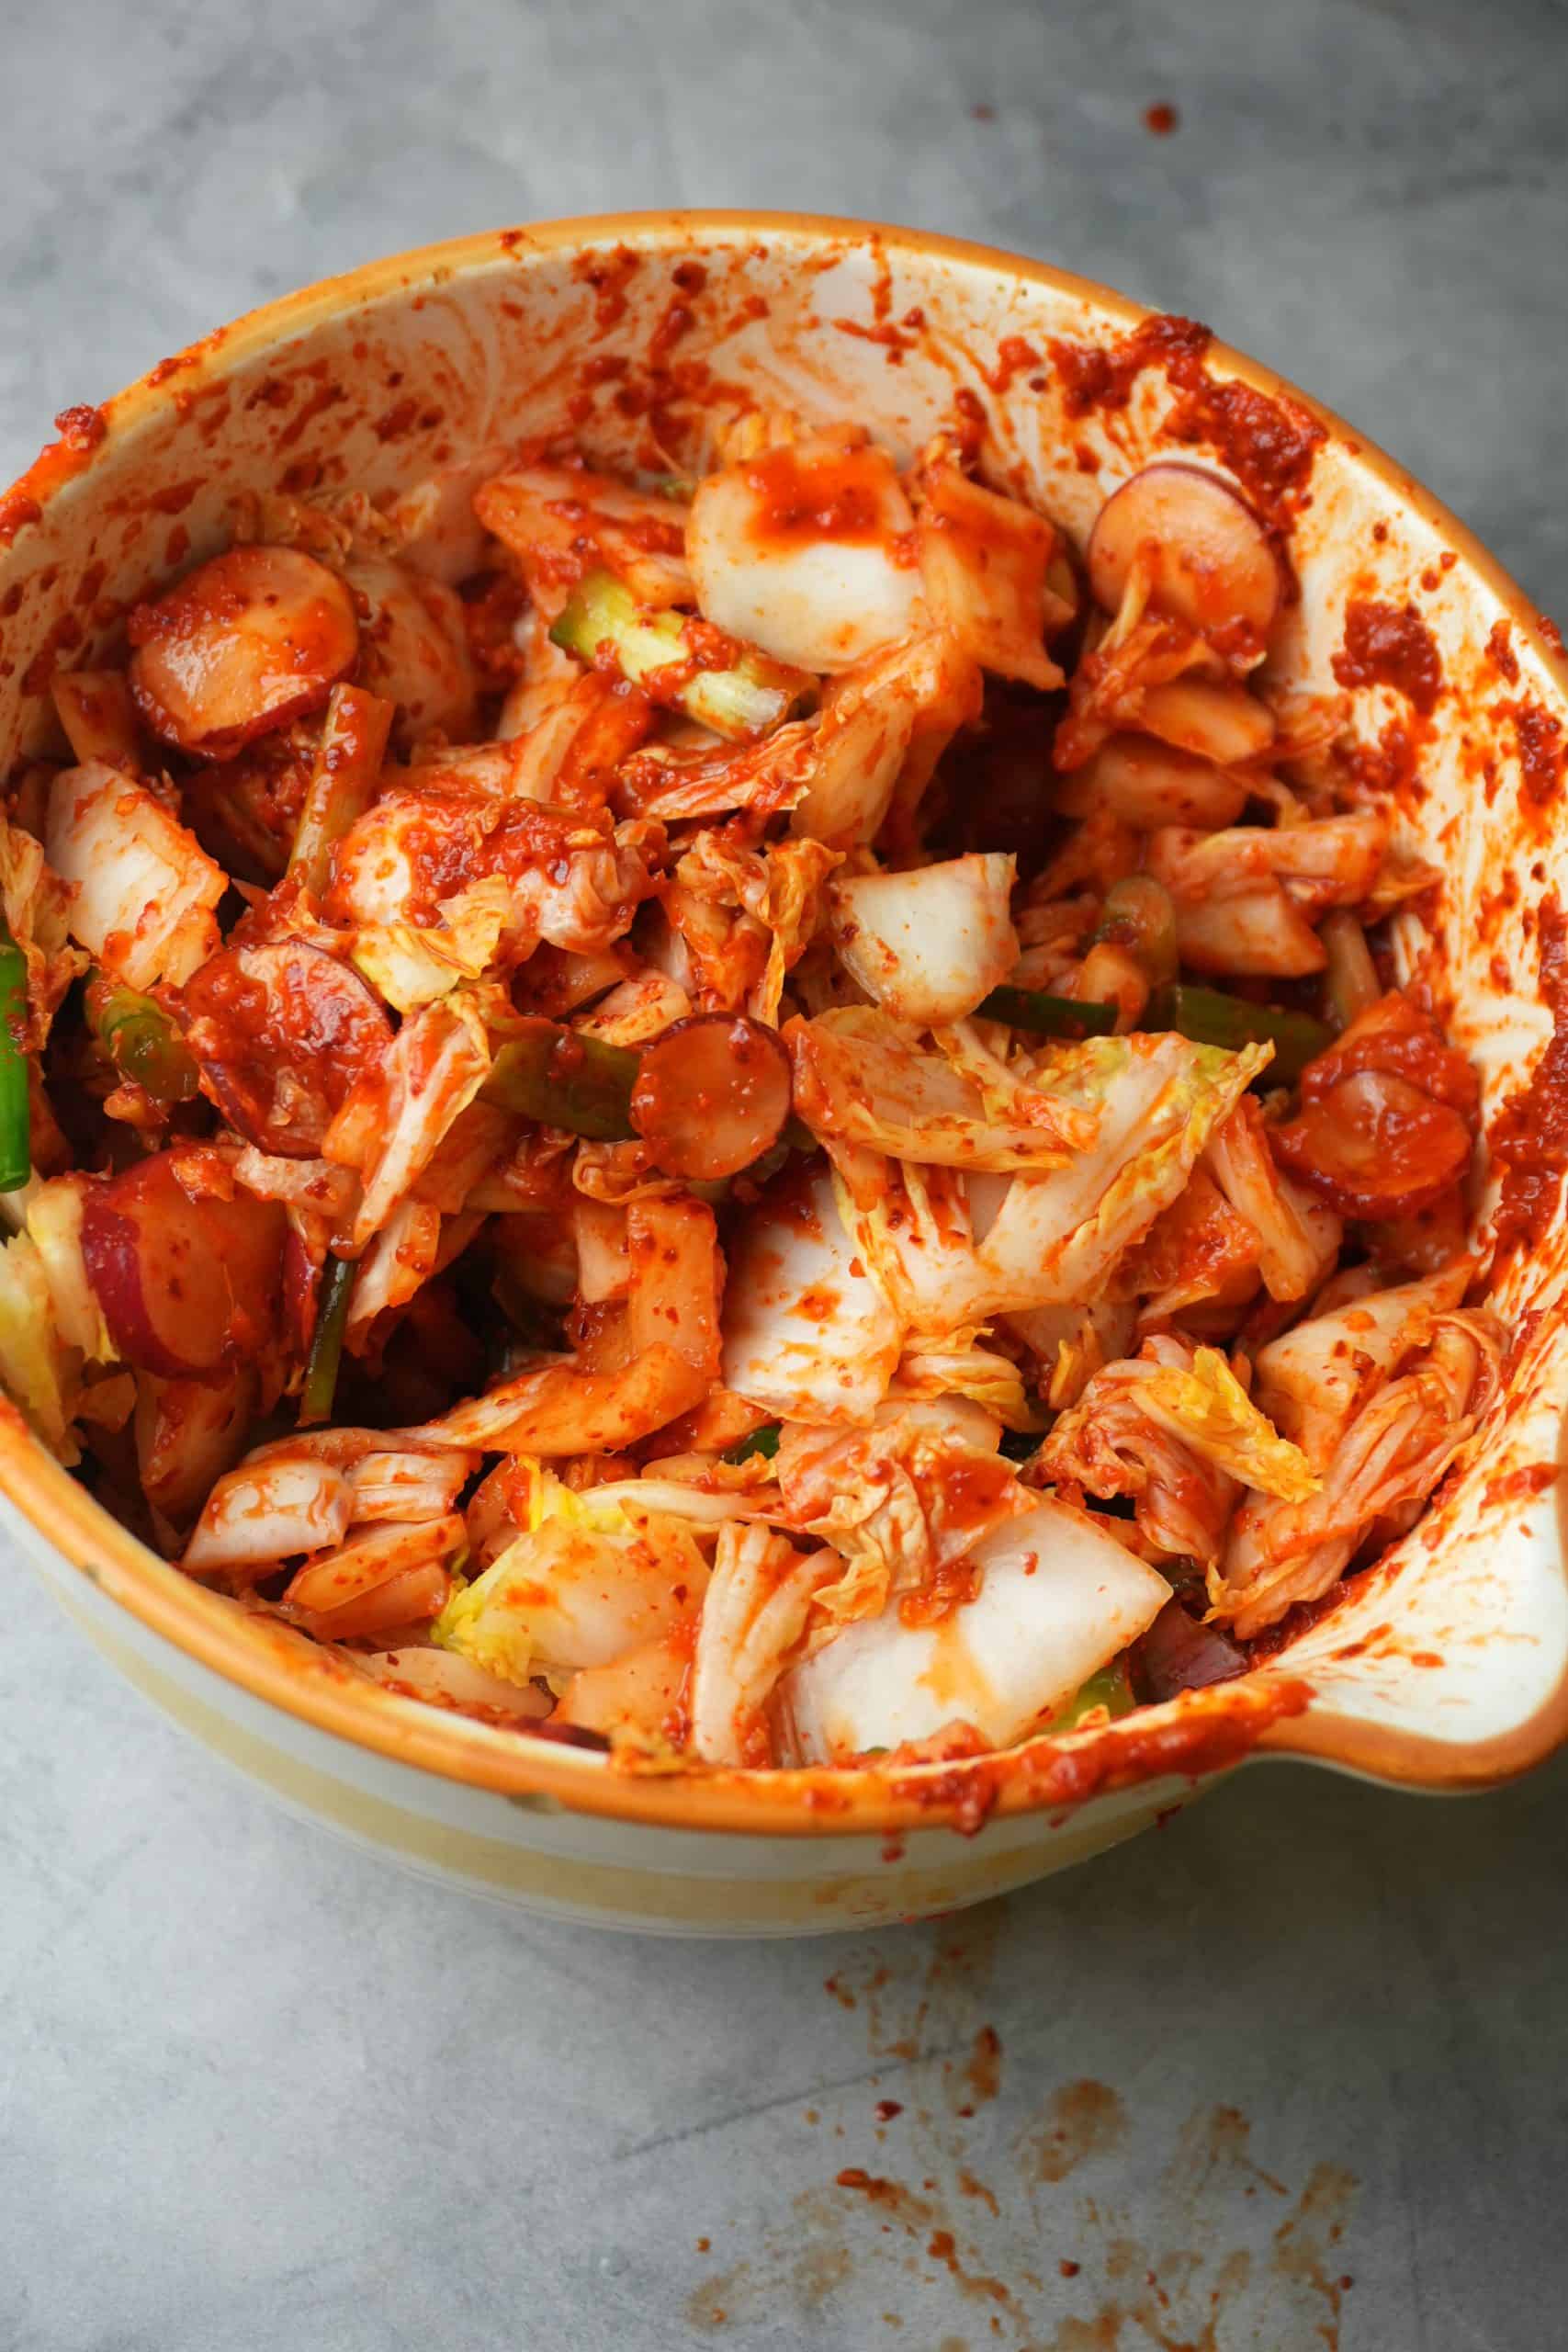
Massage the chili paste into the veggies by hand.
Step 7
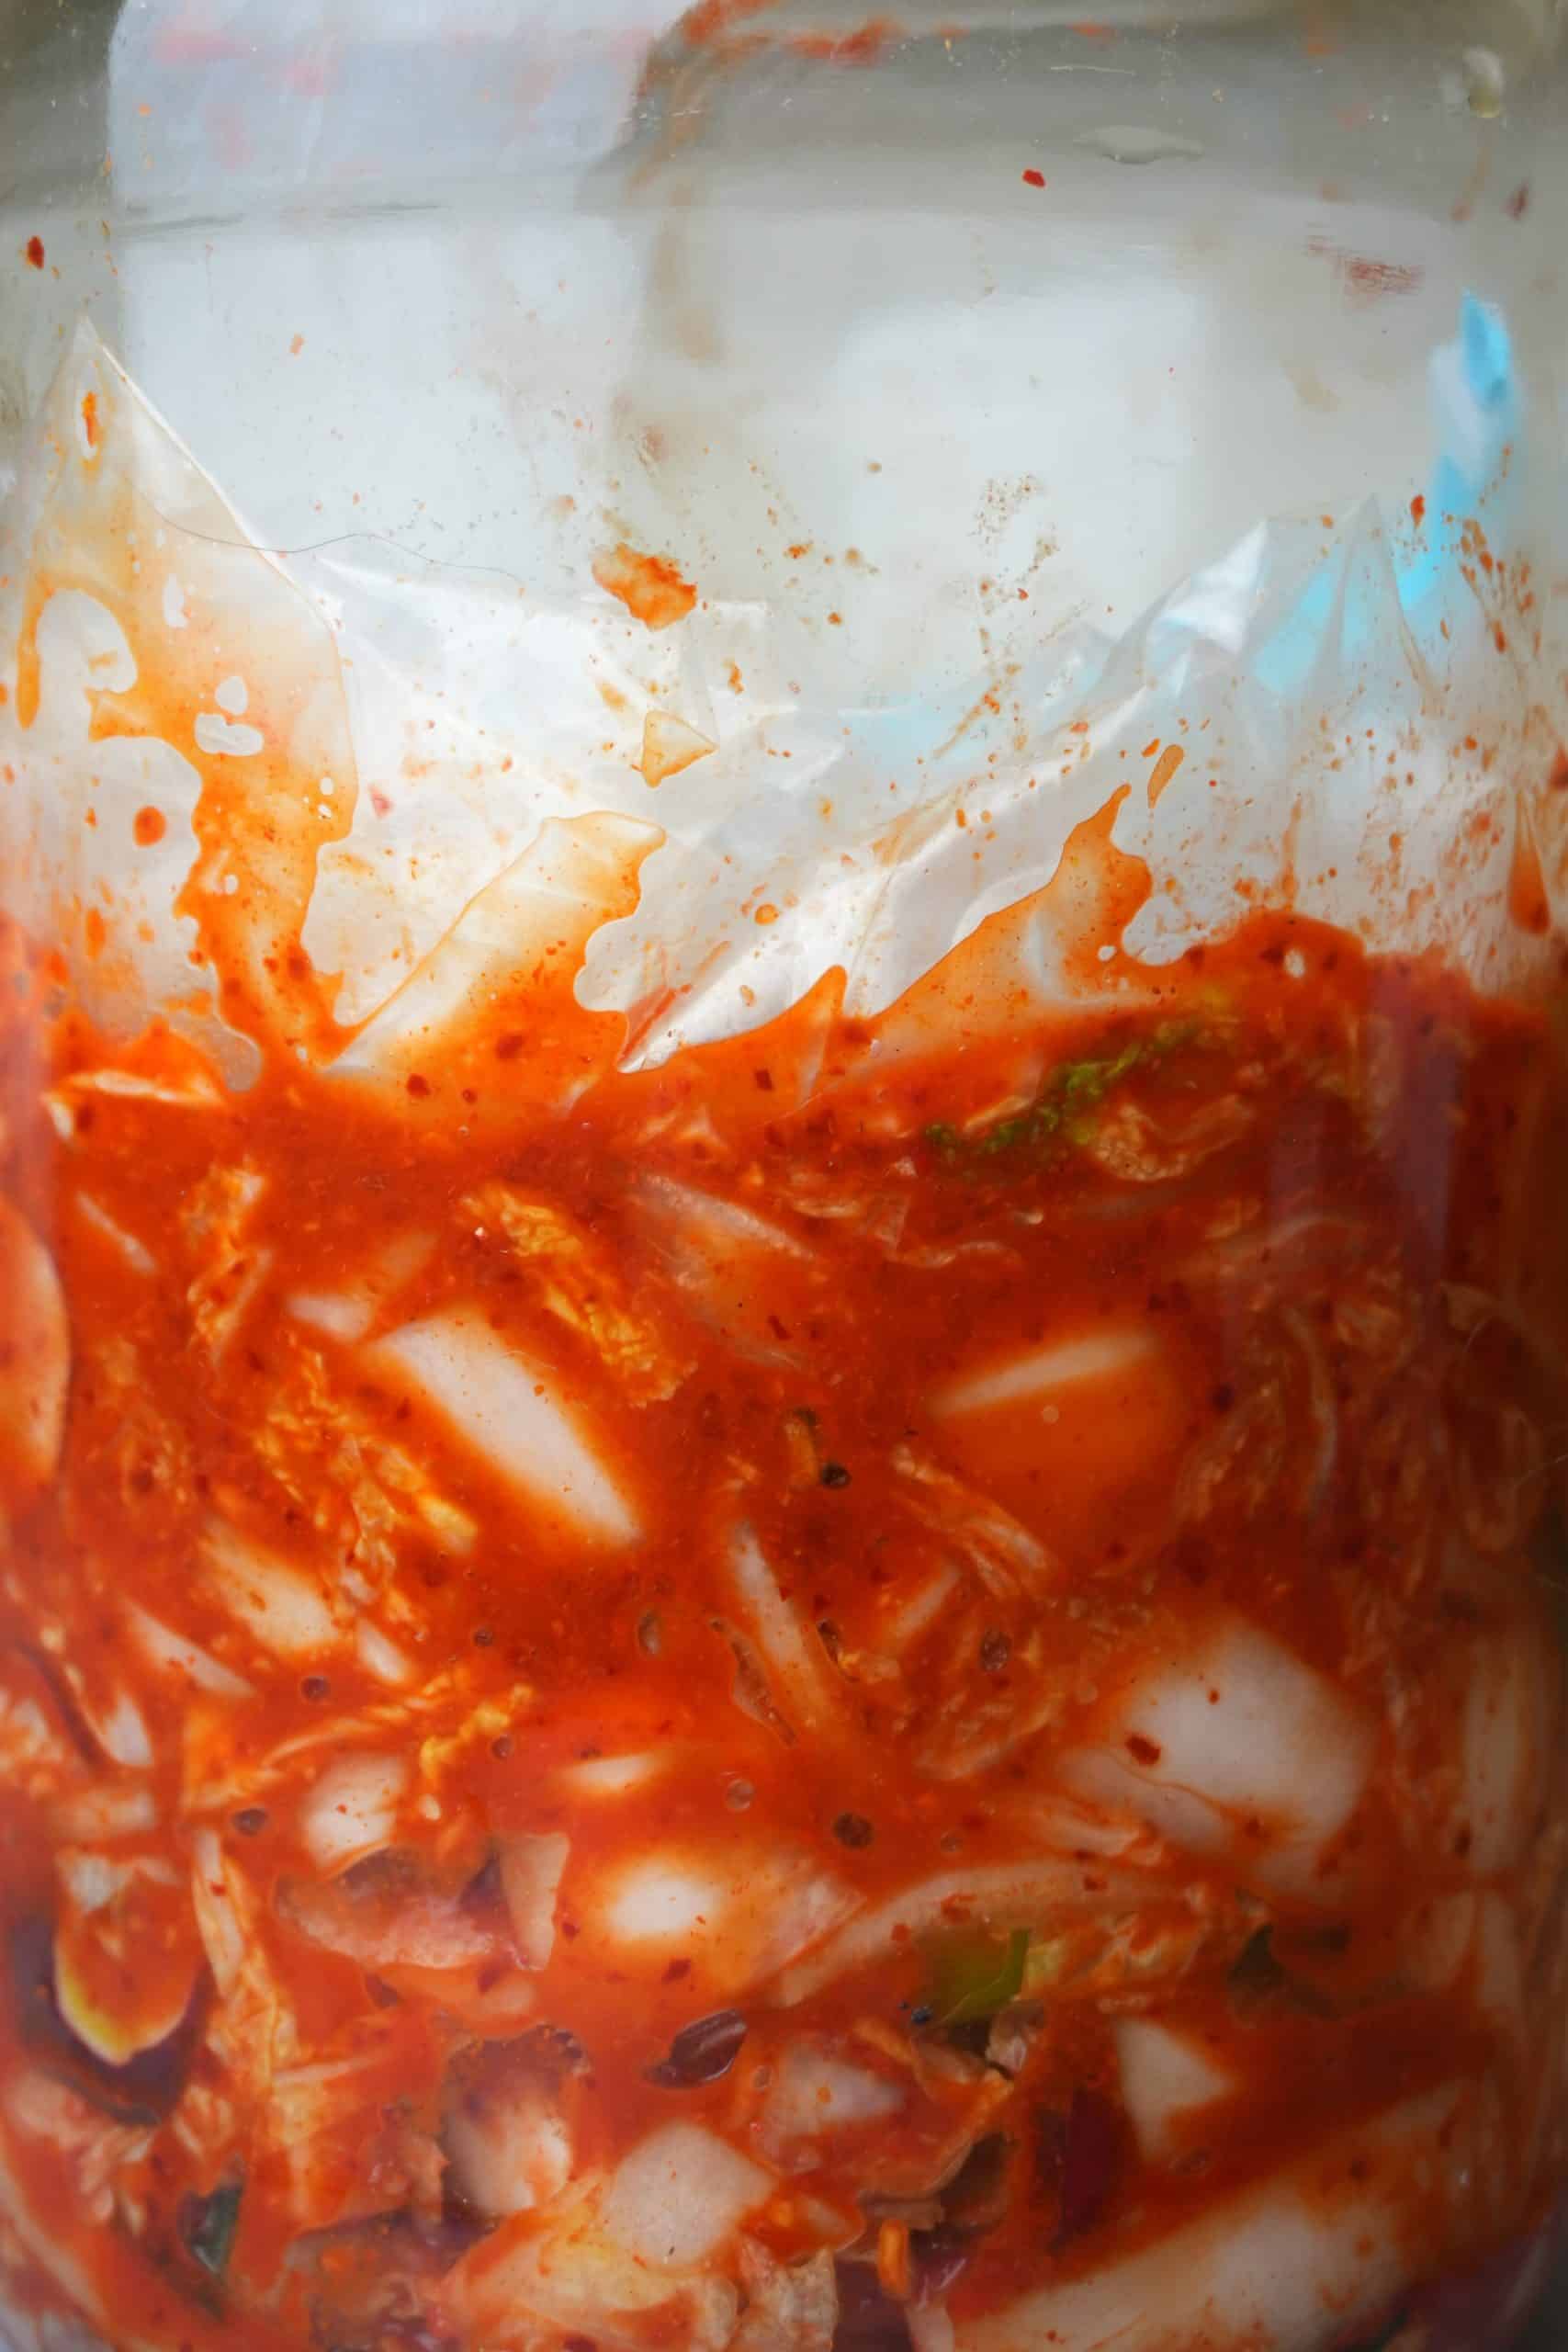
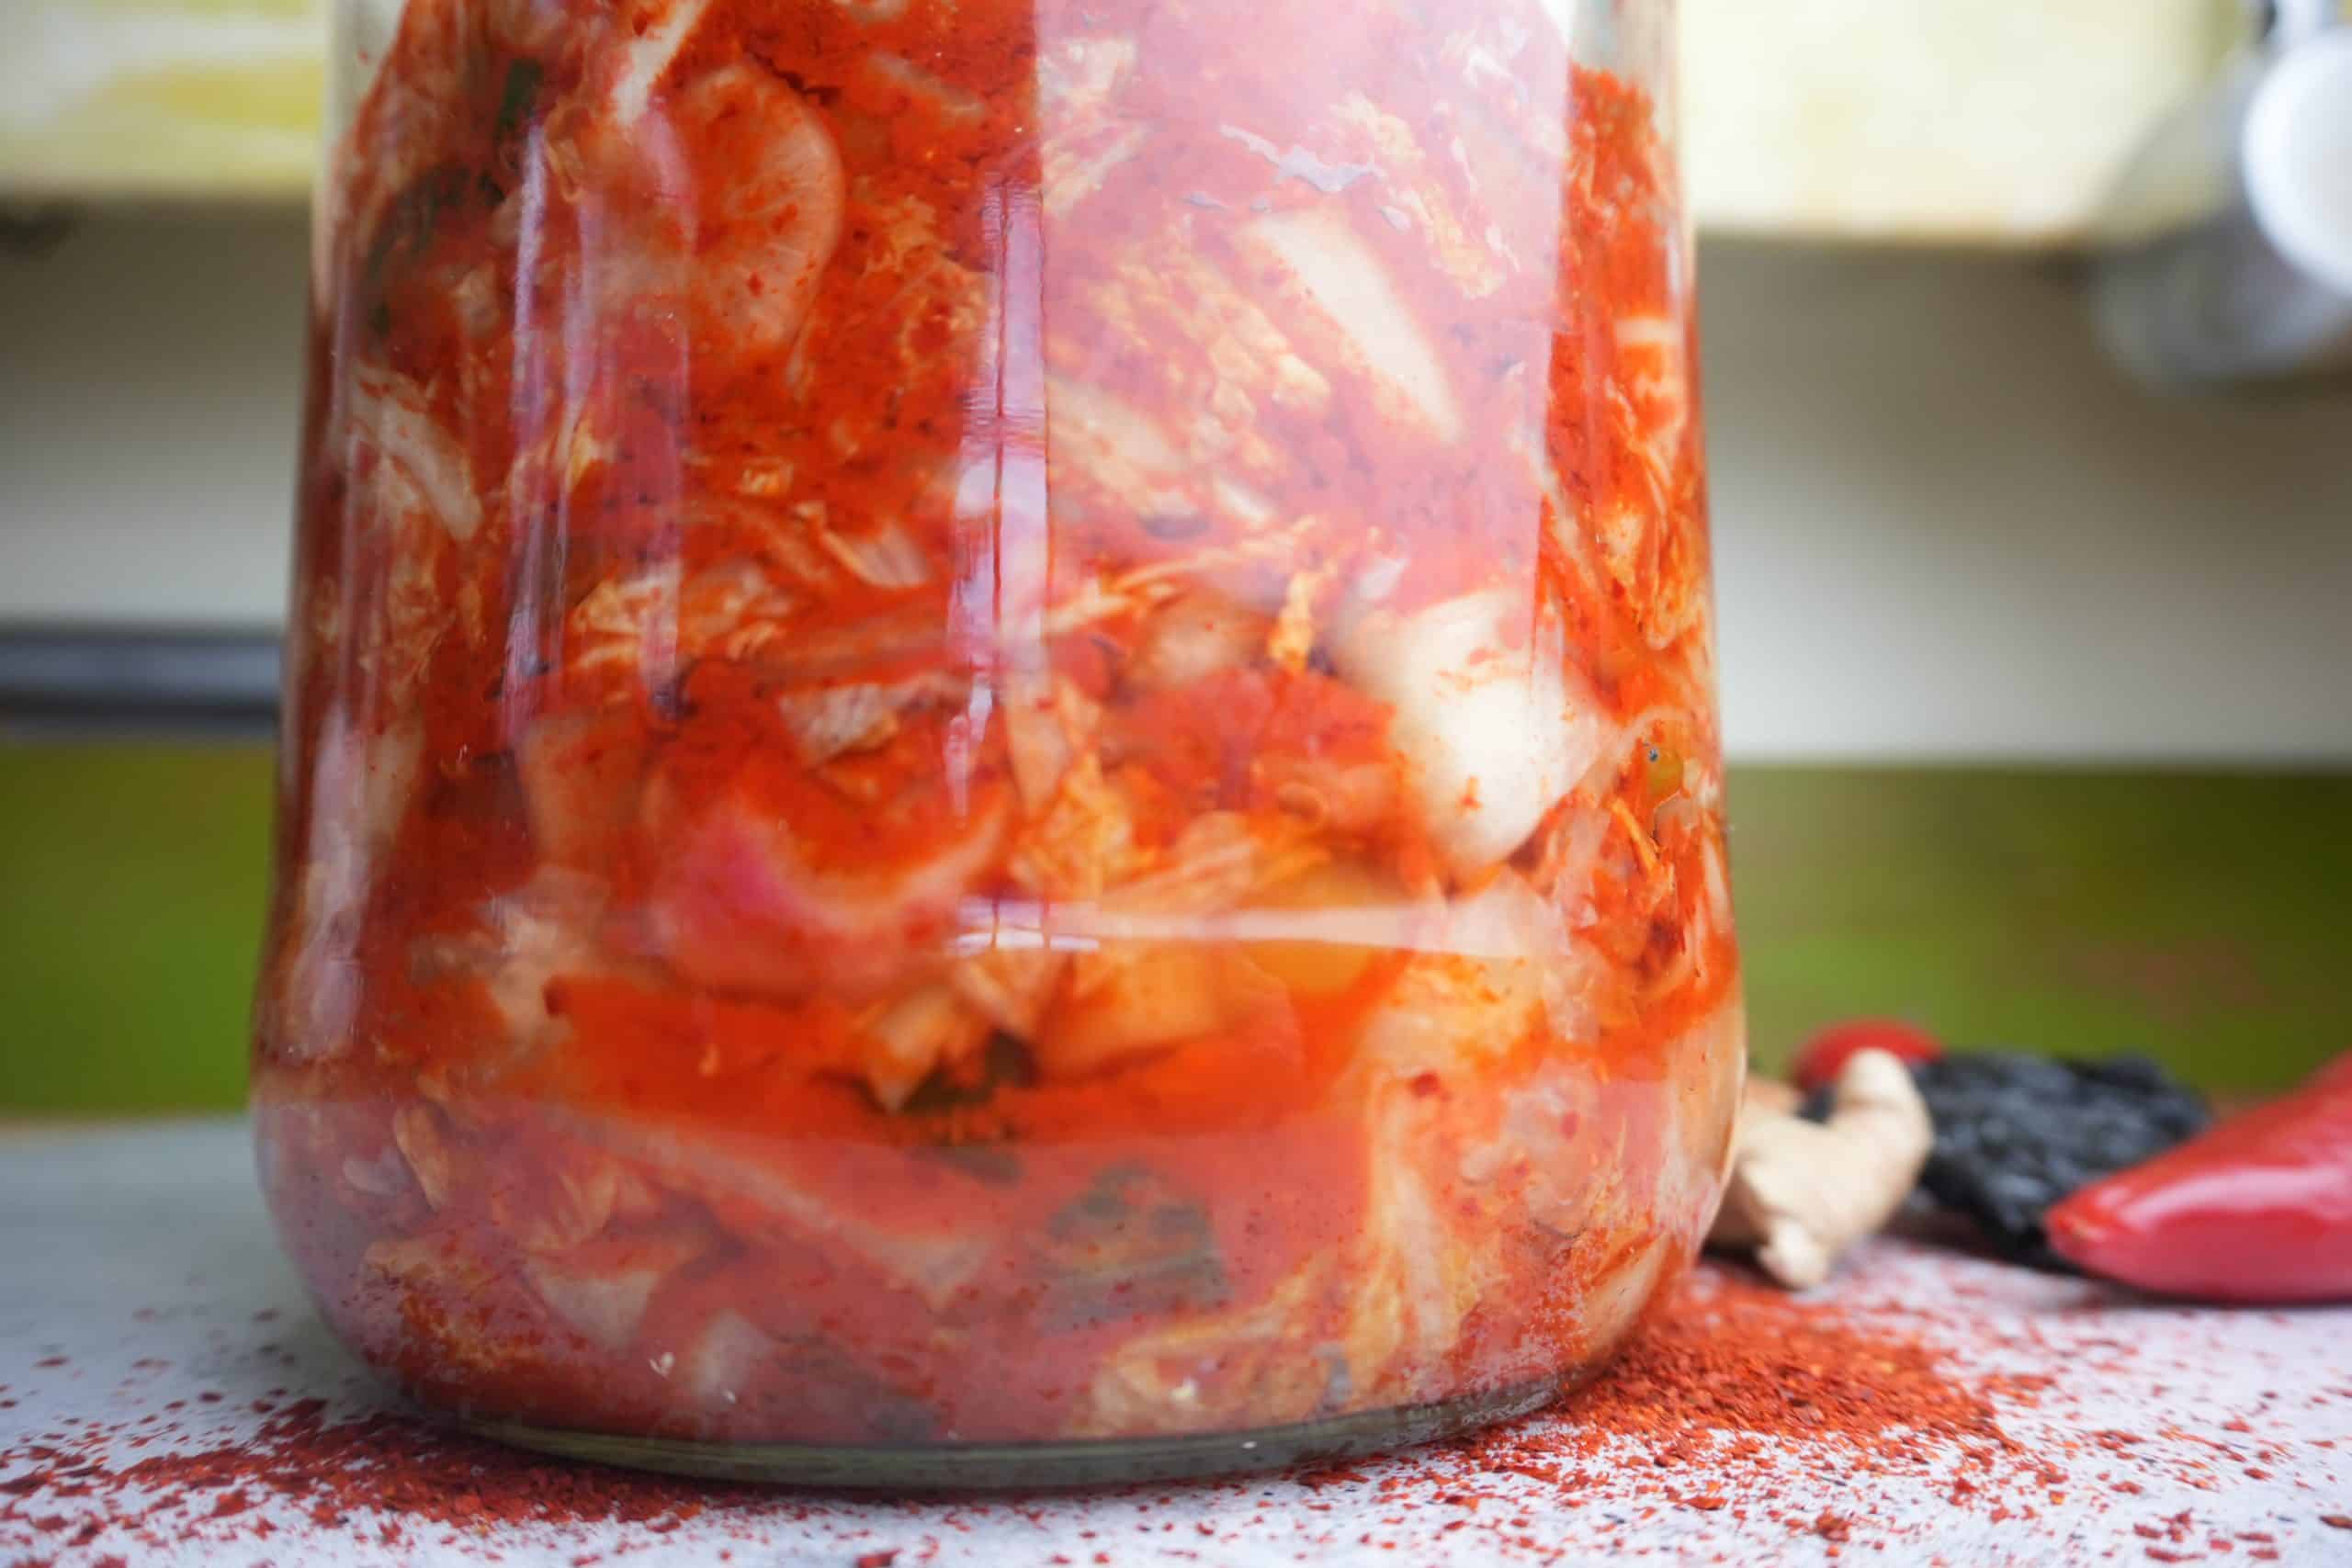
Pack the kimchi into one or more sanitized glass jars. Push the veggies down to release air pockets, and cover the top surface with plastic to prevent mold growth.
Ferment the kimchi for 24-48 hours, depending on the temperature of your kitchen. -Details about that in the recipe card below.
After fermenting at room temp, you can already enjoy the kimchi. But it gets better if you slowly ripen it for a few more days under refrigeration.

Grab my easy-yo-use app that builds your whole week with real, chef-tested vegan dinners in 30 seconds, customized to your budget, time, and taste, with a shopping list sorted by aisle.

🥣Serving Ideas
Kimchi fried rice is a NO BRAINER! You can also try making my Korean BBQ sauce grilled Seitan, vegan bulgogi, or serve this as a condiment alongside vegan Korean fried chicken or dubu jorim (spicy braised tofu).
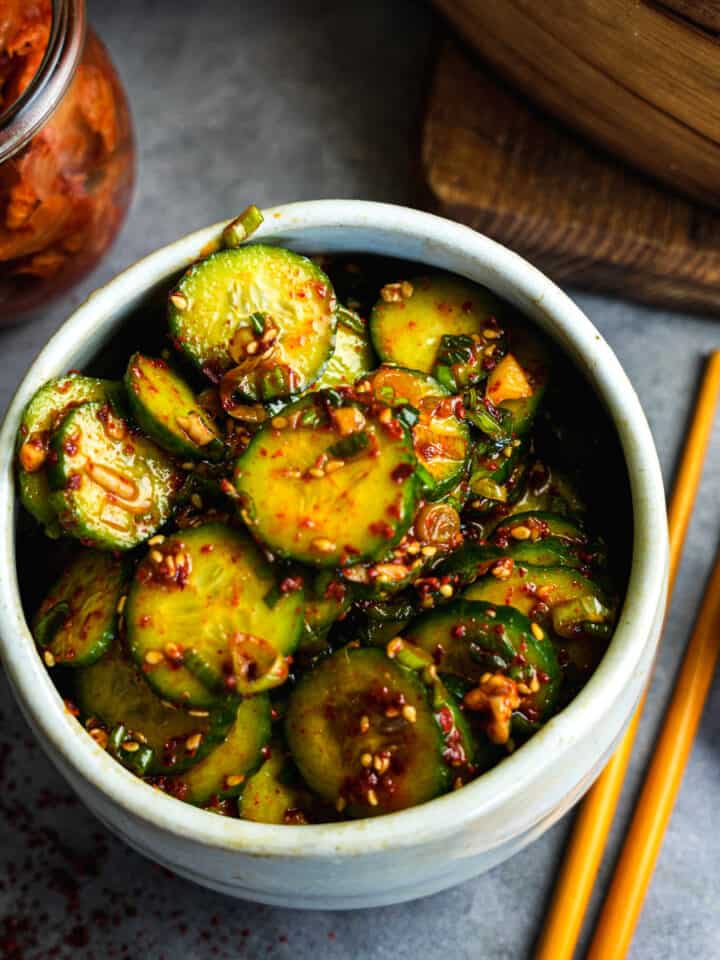
It's obviously going to slap hard with other banchans like korean carrot salad, and pa muchim and is amasing to use when preparing Korean tofu soup too.
❗️Top tips
Cut your veggies for the purpose you want to use it for!
Because I developed this vegan kimchi recipe to be used quickly on many dishes I served on my food truck, I planned it to be made with small cut veggies. That way in my Korean BBQ Seitan, or paired with my Korean cucumber salad, I could easily assemble the dishes and know that people would get a variety of kimchi flavors in each bite.
Plan for expansion.
Ensure that the jars are not filled completely to the top, leaving a minimum of an inch of empty space to allow for kimchi expansion during fermentation. The kimchi will expand a little as it undergoes fermentation.
Make as spicy (or not spicy) as you want.
If you aren't into spicy food, it is recommended to reduce the amount of gochugaru used. This recipe produces a tastefully spicy kimchi, so using half the amount of chili powder will result in a milder flavor.
Air pockets can cause kimchi to ferment too quickly.
On the first day of room temperature fermentation, use a clean metal spoon to push the cabbage back into the brine, as it has a tendency to rise above the surface initially. This will also help push out bubbles of gas that have formed.
Keep an eye on that room temp fermentation time.
It is not advisable to leave the kimchi at room temperature for an extended period. For optimal sourness, a 36-hour fermentation period at approximately 68-72°F (20-22°C) is recommended.
🤷♀️ Recipe FAQs
Almost all commercially available traditionally prepared kimchi contains fish. Making kimchi without fish sauce at home means you can control the spice level, the quality of the ingredients and ensure that it is 100% vegetarian.
You will see some small air bubbles forming in the brine of the kimchi when it's done. You can also tell by its taste and smell. Kimchi should be just a little funky and fragrant. It shouldn't be overwhelmingly sour or bubbly tasting in your mouth.
Homemade vegan kimchi can last for about a month under refrigeration if kept in sterilized glass jars. To sterilize the jars you should boil the jars and lids in a pot with a dish towel at the bottom to prevent them from breaking. Allow them to cool and briefly air dry before packing the kimchi into them.
If a jar is not full all the way, I like to use a piece of plastic (either plastic wrap or a ziplock bag) passed down directly over the top surface of the kimchi. This presses out any extra air pockets from the kimchi, and also protects the top surface from developing mold.
During the fermentation of kimchi, the natural bacteria present in the ingredients (especially in the cabbage and other vegetables) break down carbohydrates and proteins, producing lactic acid, carbon dioxide, and other compounds. This process of lacto-fermentation not only gives kimchi its characteristic sour and tangy flavor, but also creates an acidic environment that preserves the vegetables and promotes the growth of beneficial probiotic bacteria. Over time, the flavor and texture of kimchi can continue to develop and change as it ferments.
Kimchi is a traditional Korean dish made from salted, fermented vegetables, most commonly napa cabbage, and radishes. Its history dates back to ancient times, with some accounts suggesting that it was first created around 4,000 years ago.
Originally, kimchi was made simply by salting and preserving vegetables in earthenware jars buried in the ground. That method allows for a perfect stable cold-but-not-too-cold temperature that allows for a slow fermentation and great flavor to develop. The addition of chili peppers, which were introduced to Korea in the 16th century, is credited with giving kimchi its distinctive spicy flavor.
Kimchi has played an important role in Korean cuisine and culture, with many families and communities developing their own unique recipes and methods of preparation. It is often served as a side dish with rice or used as an ingredient in soups, stews, and other dishes.
During the Korean War in the 1950s, kimchi became a symbol of national identity and pride, as it was one of the few foods that remained available to the Korean people during the conflict.
Today, kimchi is enjoyed around the world, and has gained popularity in recent years due to its health benefits, which include high levels of vitamins, fiber, and probiotics.
✌️Dishes that go great with vegan kimchi


Vegan Kimchi: An Easy Korean Vegetarian Flavor Bomb Condiment!
Equipment
- food processor or blender
- glass gallon jar
Ingredients
Instructions
- Remove the stems and foliage of the radishes. Clean the daikon, red radishes and scallions by rubbing them while running warm water over them. Rinse the napa cabbage, and discard any withered looking external leaves.
- Cut napa cabbage in half and remove its core. Use the sharp tip portion of your knife to cut out a triangular section from the bottom of each half cabbage to discard it's core where the leaves connect to each other. Cut the cabbage into 1 inch thick slices, including all the rib parts. The ribs are actually extra-special-great after they are fermented, so don't waste nothing!
- Using a vegetable peeler, skin the daikon. Dice the daikon into 1 cm. cubes.
- Slice the radishes thin (1-3 mm. slices).
- Remove the roots of the scallions and any withered end parts. Then cut those lovely freshened-up-looking spring onions into inch-long sections.
- Place all the drained veggies into a clean large bowl and sprinkle them with ½ cup of salt (you heard that right, but don't worry, trust me!). Pour 12 cups of cold water over the veggies until they are covered. Place a heavy plate over the veggies in the brine to weigh them down and keep them submerged. Place a cover over the bowl so that no dust, insects, or stuff floating through the air of your kitchen can possibly enter the bowl while the veggies are in the brine. I use a baking pan to cover my bowl and a tea kettle on top of it to weigh it down, but you can use whatever as long as it is clean.
- Allow the vegetable to brine for 5 hours. This time allows the salt to draw moisture out of the veggies and also kill off some of the unwanted bacteria that may be present. It is an essential step, so don't rush it!
- After 5 hours, drain the brined vegetable in a large colander in your sink. Massage the veggies under cold running water to get off as much of the salt as possible. It should take a couple of minutes. No need to squeeze the living daylights out of your veggies.
- Allow the veggies to drip dry in the colander while you get the chili paste made.
- Place the onions, ginger, garlic, gochugaru, sugar, salt and water into a food processor or blender and puree until smooth. You may need to stop the blending once or twice to scrape down the inside of the blender/food processor pitcher with a rubber spatula to ensure no big fragments of onion remain.
- Place the drained veggies and chili paste into a bowl and massage the paste into the veggies by hand until it is well combined, and no clumps of plain veggies remain.
- Pack the kimchi into a sanitized glass gallon jar, or multiple clean mason jars. Press the kimchi down to push out air pockets. Cover the top of the kimchi in the jar with a layer of plastic. Wipe down the inside and outside of the jar so no kimchi juice is visible above the plastic-covered top layer. Place a lid onto the jar(s) and allow the kimchi to sit at room temperature (68-72 degrees is ideal) out of direct sunlight. It should ferment at room temperature for 24 hours if the temperature in your kitchen is over 72 degrees, 36 hours if the temperature is between 68-72 degrees, and 48 hours if the temperature is below 68 degrees.
- After the 24-48 hour room temperature fermentation, you can use the kimchi, but it's best to let it ripen a bit more under refrigeration. Before placing the kimchi in the fridge, press the kimchi down using a clean metal spoon to remove any pockets of gas which have built up. You can use the kimchi any time now, or let it continue to ripen and ferment slowly under refrigeration for up to a month.
Notes
Enter your email & I'll send it to your inbox. Plus, get great new recipes from me every week!
By submitting this form, you consent to receive emails from Cinnamon Snail.


Jen says
Can I use this recipe base for radish or cucumber kimchi?
Adam Sobel says
Yes! But I have a separate radish kimchi recipe you can check out too.
Clara says
I have been making giant batches of this kimchi every couple of months for years! I love it so much. I usually ferment a bit longer because I like it really sour. I can’t believe how expensive a tiny jar is at the store now. Make this instead!! And then make kimchi soup from Street Vegan!!
Adam Sobel says
I'm so glad you love it and that kimchi soup recipe in my cookbook! Homemade kimchi is such a gamechanger, especially when the store bought stuff is inferior in quality and like $9 for about two cups of it!