*This post may contain affiliate links. Read more »
This Filipino Karioka recipe is ten steps ahead of the pack, dripping with an ube vanilla bean glaze.
This fine-tuned recipe makes crispy golden-brown rice balls that are fluffy and chewy inside and deliver perfection every time. Whether you’re a seasoned pastry chef or a kitchen newbie with your apron already tied on inside out, these delightful treats are incredibly easy to master, no matter if you make them in a pot on the stove, in a deep fryer, or an air fryer.


Enter your email & I'll send it to your inbox. Plus, get great new recipes from me every week!
By submitting this form, you consent to receive emails from Cinnamon Snail.
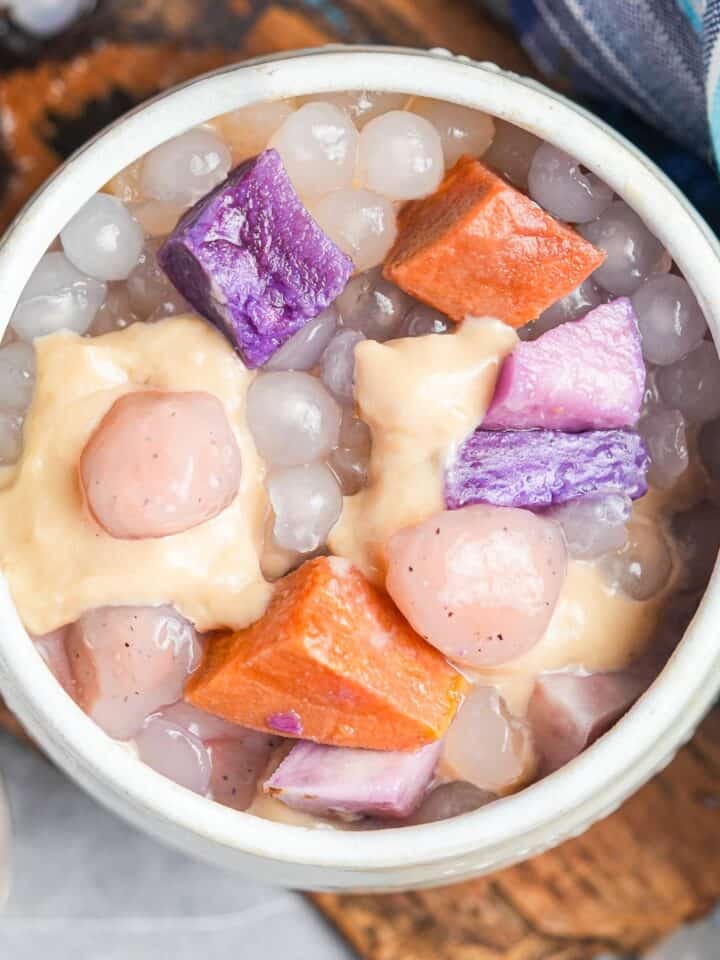
Karioka, also known as Carioca or Cascaron, is a popular Filipino street food snack made of glutinous rice flour and coconut. Like Japanese mochi donuts and Chinese sesame balls it’s got a crazy balance of chewy, crispy, and gooey textures that make it downright hard to stop eating. Unlike the filled Chinese sesame balls I cover in my vegan dim dum cooking class, karioka is simpler and easier to make, typically served with a sweet glaze or coating.
The addition of ube extract and vanilla bean powder takes this particular Filipino mochi balls recipe to the upper edges of the galaxy of goodness.
Ready to make the best Karioka you've ever tasted? Follow my detailed steps, and you'll have a batch of these delicious treats ready in no time. Let’s dive in and get cooking!
Jump to:
- 🤷♀️ Why the heck should you learn these Filipino mochi donuts from me?
- 🥰Why you'll adore this recipe
- 🍩 Ingredients for Filipino Karioka
- 🤯Variations
- 📖 How to make Karioka
- 💡Serving Ideas for this Recipe
- 👉Top tips
- 🤷♀️ Recipe FAQs
- ✌️A few other sweets you can serve with this recipe:
- Karioka with Ube Vanilla Bean Glaze
🤷♀️ Why the heck should you learn these Filipino mochi donuts from me?

If this is your first visit to my website, you might not know that I am an award-winning donut maker. The rosewater pistachio variation of my vegan apple cider donuts has been featured in the New York Times, and my Medhu Vadai and Korean twisted donuts have been featured on the food network. I won the Vendy Award for my Vanilla Bourbon Vegan Creme Brûlée donuts. I’ve represented the USA at the World Street Food Congress in the Philippines, so I’ve had direct access to learn from some of the best Filipino street food chefs. Between 2010-2020, I made and served more than 1,000 donuts almost every single day. Suffice to say, vegan donut recipes are something I have a sorta super-good handle on!

🤫 Learn the secrets for perfect vegan Filipino meals
This guide to my most popular plant-based recipes from the Philippines is 100% FREE, & you'll love the actual heck out of it 🥰
🥰Why you'll adore this recipe
✊ Vegan AF & GF: Like all of my plant-based Filipino recipes, no animal products are used in this authentic recipe. It’s also a dessert that is naturally one of my gluten-free vegan recipes too!
🥥 Coconut Milk Perfection: Using coconut milk in the dough adds a rich, creamy flavor that pairs beautifully with the ube glaze. This creates a friggin' legendary flavor and provides a smooth, consistent texture to these Filipino mochi balls that's easy to work with.
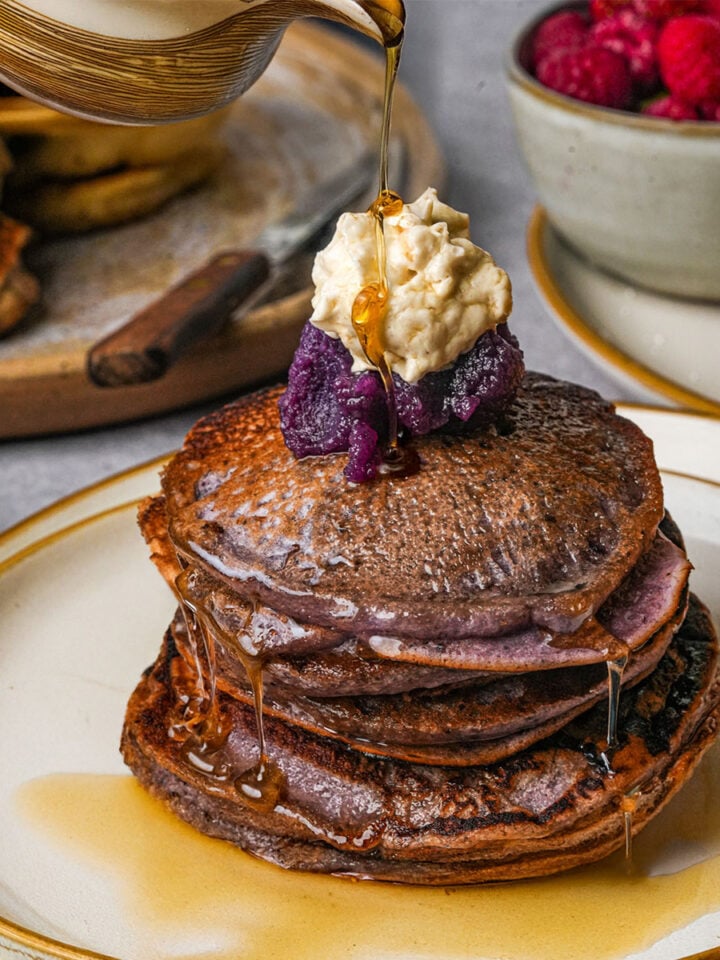
🍠 Ube Magic: The addition of ube extract in the glaze brings a vibrant color and a unique, crave-able aroma without having to get the ube halaya you would use for making stuff like ube pancakes with.
✅ Tested and Approved Worldwide: Like all the vegan recipes I share, I have worked long hours to tweak and perfect this one, and then I shared it with a massive team of recipe testers who replicated it with great success all around the world. So yeah, headsup; this recipe for carioca is pure rice-ball heaven.
🍩 Ingredients for Filipino Karioka

Sweet Rice Flour (Galapong)
Glutinous rice flour, made from sticky rice, is essential for the chewy texture of karioka. Don’t let the name fool you. This stuff is completely gluten-free and rich in carbohydrates. No other rice flour will work just right for recipes like tupig, bubur sumsum, and this one.
Tapioca Starch
My recipe is different from most because I use a small amount of tapioca starch to level up the chewiness and elasticity of the karioka dough. Made from cassava root, it's gluten-free and is crucial in southeast Asian recipes such as Indonesian biji salak and Vietnamese Kem Chuoi. I also use it to make the perfect steamed rice noodles in my chee cheung fun recipe. Anyway, if you can’t get your hands on tapioca starch, this recipe also works fine by swapping it out for an equal amount of potato starch, arrowroot, or cornstarch.
Coconut Milk (Gata)
Coconut milk adds a rich, creamy flavor to the dough and glaze. It's high in healthy fats and provides a smooth consistency. If you need a substitute, coconut cream (NOT that bogus-ass “cream of coconut” that airports make low quality piña coladas out of) works just fine in the recipe, and you can use any that’s leftover to make the best vegan apple pie in the galaxy. So, there’s that.
Coconut (optional)
If you want these sweet rice balls to turn out perfectly smooth and round, adding coconut makes that a little trickier, because it makes the dough a little lumpy. But if you don’t care about that, there are three great routes you can take to add coconut.
You can use regular desiccated coconut shreds like you would use in a vegan carrot cake, or otherwise fresh grated mature coconut meat like you would use in kuih dadar, or on the outside of ondeh-ondeh.
Otherwise, you can totally use rinsed buko ("coconut sport” from young green coconuts in syrup), rinsed, as you would use it in Buko Pandan salad. Just rinse those off and drain them well so they don’t make the dough too sweet or wet.
Palm Sugar
Palm sugar, used in the glaze, has a deep caramel flavor and lower glycemic index compared to regular sugar. I use the stuff pretty religiously as my sweetener of choice in Southeast Asian desserts like Filipino Suman Malagkit, Vietnamese Che Khoai Mon, and Bubur chacha from Singapore. Coconut sugar and brown sugar are great substitutes, and can be plugged into this recipe measure for measure.
Ube Extract
Ube extract gives the glaze its vibrant purple color and unique taste. It's the same purple yam you use to make bubur cha cha from Singapore, rich in antioxidants and has a remarkable fragrance. If you can't find ube extract, you can use a small amount of purple sweet potato powder, but I find that this is often a little gritty, and doesn’t have a very noticeable flavor.
Vanilla Powder
I love the convenience of vanilla powder for recipes like this one and my vegan bomboloni, too. It's such a great way to get intense, vanilla flavor without having to mess with whole pods.
Don’t fret, though as vanilla extract works just fine, although it doesn’t have the little fragrant specks of vanilla bean. But whatever you do, please promise me you will never use artificial vanilla (“vanillin"), because it tastes and smells like cheap perfume that a 13-year-old would wear a crazy, over-the-top amount of to their bar/bat mitzvah.
*See the Karioca dessert recipe card at the bottom of the page for exact quantities, nutritional info, and detailed cooking directions.
🤯Variations
Latik Karioka
Coat the fried sticky rice balls with latik, which is caramelized coconut cream. This gives the karioka a rich, toasty flavor and a slightly crunchy texture. Simply cook coconut cream over medium heat until it separates, and the solids turn golden brown.
Pandan Lemongrass Coating
After glazing, roll the fried sweet rice balls in a mixture of sugar that has been ground to dust with fresh (or frozen) pandan and a little lemongrass powder (the same stuff I use in vegan banh mi and bakwan sayur recipe). This layers on more of those glorious herbal notes we love in Southeast Asian desserts, especially in this (karioka) Filipino dessert.
📖 How to make Karioka
Nail this on your first shot by following these step-by-step photos with helpful tips. Or scroll down to the bottom of this page for the easy-to-print recipe card.

Step One
Dough Boys:
In a large mixing bowl, mix the glutinous rice flour, tapioca starch, coconut milk, baking powder, and salt. Knead for a few minutes until the mixture forms a smooth dough for your Filipino karioka.
✅ Once the dough is formed, if you are going to add coconut, mix it in and knead for another minute so that it’s evenly combined.

Step Two
Roll and Poke:
Form the dough into small balls about one inch (2.5 cm) in diameter.
Pierce each ball with a skewer, pin or toothpick that gets dipped in rice flour between each ball. This makes it easier to skewer the balls once they are fried, and also prevents them from bursting while cooking.

Step Three
Warm Up Time:
Heat oil in a Dutch oven or thick-bottomed pot over medium-high heat until it reaches 350°F (175°C). You can double-check the temperature with a frying thermometer.
✅ If you have one, you can use an air fryer, or a counter top deep fryer instead.

Step Four
The Frying Dutchmen:
Gently place the dough balls into the hot oil, frying in batches to prevent overcrowding. Fry for 4-6 minutes until they are golden brown and crispy. Transfer the cooked balls to a wire rack over a baking pan to drain excess oil and cool.

Step Five
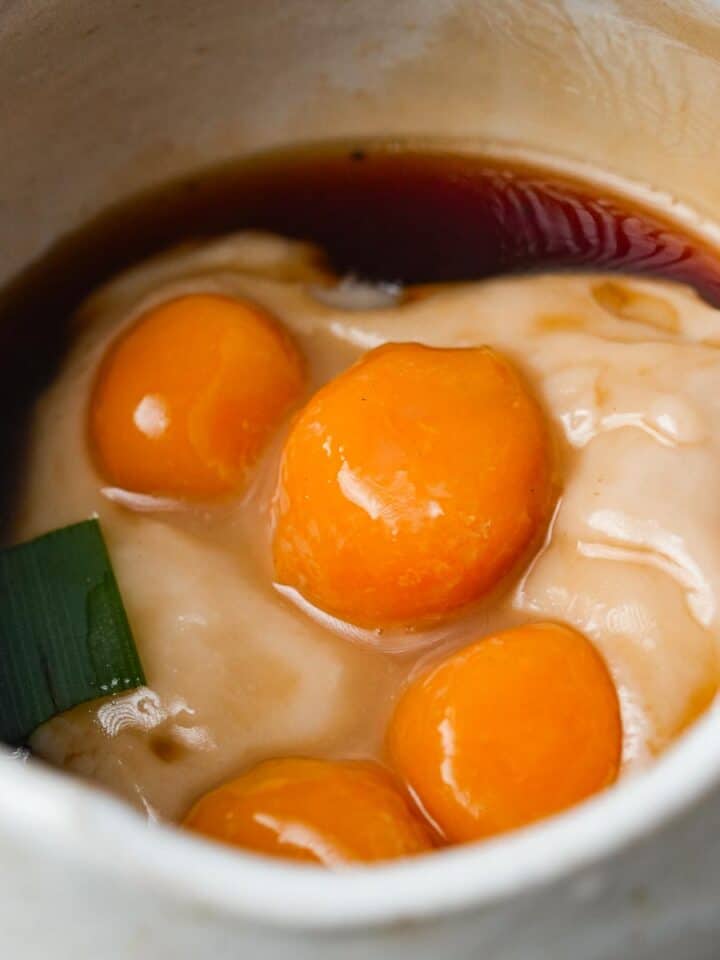
Sweet Glaze Magic:
In a small saucepan, stir together the palm sugar, coconut milk, ube extract, and vanilla powder. Cook over medium heat, stirring constantly, for 5 minutes until the sugar dissolves and the mixture thickens and bubbles. Remove from heat.

Step Six
Stabby Stabby:
Thread the fried balls onto bamboo skewers or reusable metal skewers. A typical serving is three balls per skewer, but adjust the portion size to your preference.

Step Seven
Glaze Craze:
Let the glaze cool slightly before dipping the skewered karioka balls. Make sure each ball is evenly coated on all sides with the glaze. Let them drip over the pot before placing the skewers back on the wire rack to set for a few minutes.

Step Eight
Serve and Enjoy
Serve the karioka warm, optionally garnished with additional shredded coconut, perhaps with some vegan whipped cream or vegan cream cheese frosting on the side if you are feeling a little wild.
💡Serving Ideas for this Recipe
Karioka makes a great dessert to serve after Filipino classics such as sitaw, a sautéed mix of long beans, tofu, and jackfruit “pork” for a hearty and satisfying meal. Ensaladang talong, a Filipino charred eggplant salad, is great served alongside vegan sisig, ginataang kalabasa or ginisang munggo, with these fried mochi donuts for a sweet afterwards.
👉Top tips
- Keep it Dry: To prevent sticking when shaping the dough balls, ensure your hands and work surface are dry. Dusting your hands with a bit of glutinous rice flour can help maintain smooth handling. On the other hand (see what I did there…), you can go in the opposite direction and work with very lightly oiled hands instead. Just don’t do both methods. Pick one!
- Consistent Oil Temperature: Maintaining the oil at a consistent 350°F (175°C) is crucial for even frying. If you aren’t using an air fryer or thermostatic deep fryer (like I like to use for making buñuelos and picarones) use a frying thermometer to monitor the temperature, and start the oil well in advance so you can see if it is slowly spiraling out of control on you.
- Poke Holes in Dough Balls: Poking a small hole in each dough ball before frying helps prevent them from exploding and reduces splattering. This tip ensures a safer and cleaner frying process for this recipe for karioka.
- Cooling and Setting: After glazing, let the karioka balls set on a wire rack for a few minutes. This allows the glaze to firm up, ensuring a perfect finish without any sticky mess.
🤷♀️ Recipe FAQs
Like most fried things, Koriaka is best consumed fresh. But if you absolutely must store them for later, ideally, don’t glaze them. Store at room temperature in an airtight container for up to two days. When you are ready to serve them, warm them briefly in a toaster oven or in a covered frying pan on the stove, and then glaze them and let them set before serving.
Use a neutral oil with a high smoke point, such as canola, vegetable, or sunflower oil for this karioka recipe. These oils help achieve a crispy texture without adding weird flavors (I am thinking about peanut and coconut oil).
Let the glaze cool slightly before dipping the karioka balls. If the glaze is too hot, it won't adhere well. Ensure the balls are well-drained and slightly cooled before glazing to get an even coating.
Use a frying thermometer to ensure the oil reaches and maintains 350°F (175°C). Consistent oil temperature is key for evenly cooked and crispy karioka.
Yes, you can make karioka in an air fryer. Set the air fryer to 350°F (175°C) and cook for about 8-10 minutes until golden brown and crispy.
If the glaze is too runny, add more powdered sugar. If it's too thick, add a small amount of coconut milk until you reach the desired consistency
The oil used for this karioka, Filipino food project can be used for other fried dishes like tempe Mendoan, vegan Fried Chicken, Thai spring rolls, vegan drumsticks, or Indian bhaji. Want to stay within the realm of Filipino food? Nothing is better to make alongside these vegan mochi donuts as turon, stuffed with saba bananas and jackfruit!
If you aren’t use it within 24 hours, strain it to remove any food particles that will cause the oil to go rancid faster. Let it cool, and store it in an airtight container in a cool, dark spot. Use it within a few weeks, but avoid reusing it more than once or twice for health reasons. Once even a little bit dark in color, the oil should be disposed of.
✌️A few other sweets you can serve with this recipe:


Learn to make absurdly good vegan food from the Philippines in a super-fun recorded cooking class with Chef Adam Sobel!


Karioka with Ube Vanilla Bean Glaze
Equipment
Ingredients
- 2 ¼ cups glutinous rice flour
- 2 tablespoons tapioca starch
- 1 ¼ cups coconut milk
- ½ teaspoon baking powder
- ¼ teaspoon salt
- ½ cup young coconut strings, or shredded coconut optional
- Canola oil vegetable oil, or sunflower oil for deep frying
Glaze:
- 1 cup palm sugar coconut sugar or brown sugar
- ⅓ cup coconut milk
- ½ teaspoon ube extract
- ¼ teaspoon vanilla powder or vanilla extract
Instructions
- In a large mixing bowl, combine the glutinous rice flour, tapioca starch, coconut milk, baking powder, and salt. If desired, mix in the shredded coconut. Knead the mixture until it forms a smooth dough.
- Shape the dough into smooth balls, about one inch (2.5 cm.) in diameter.
- Prick the balls with a toothpick or metal pin which has been dipped in rice flour to help prevent the karioka from bursting while they cook.
- Heat oil in a Dutch oven or pot over medium-high heat until it reaches 350°F (175°C). Use a frying thermometer, or make in a tabletop deep fryer or an air-fryer.
- Carefully add the dough balls to the hot oil, frying in batches to avoid overcrowding the pan. Fry until the karioka balls are golden brown and crispy, approximately 4-6 minutes. Use a slotted spoon to transfer the cooked balls to a wire rack suspended over a baking pan to let the balls drain and cool.
- In a small saucepan, combine the palm sugar, coconut milk, ube extract, and vanilla powder. Cook over medium heat, stirring constantly, until the sugar is fully dissolved and the mixture thickens slightly, around 5 minutes. Remove from heat.
- Skewer the fried balls onto a Woden skewer or reusable metal skewer. A typical serving is to place 3 balls on each skewer, but I 100% trust you to control the portion size as you like.
- Allow the glaze to cool slightly before dipping the skewered karioka balls. Ensure each ball is evenly coated on all sides with the glaze. Return the dipped skewers to the wire rack to set for a few minutes.
- Serve the karioka warm, optionally garnished with additional shredded coconut.
Notes
Enter your email & I'll send it to your inbox. Plus, get great new recipes from me every week!
By submitting this form, you consent to receive emails from Cinnamon Snail.


Kelly McLaughlin says
I just tried this recipe today and it is excellent! I used the airfryer and they turned out perfectly. The ube glaze is delicious. I will make these again!
KRB says
These were fun and surprisingly easy! The dough is so quick to make, and usually frying makes a huge mess but these were nice and neat - no little bits falling off into the oil and burning/smoking. I cheated and used a different glaze since I had some leftover from a different doughnut making project - will definitely try the ube next time, but still loved the flavor/texture of these.
Adam Sobel says
Super-glad you made these! Desserts are one of the things that are so exciting to me about the Filipino culinary tradition.